Review and testing of RDP clients for iOS
- Home
- Blog
- Technical Support
- Review and testing of RDP clients for iOS
Report from the test field
In one of the notes, we have already tested and selected an RDP client for Android devices, and today, on popular requests, we publish the results of a similar test drive of applications for iOS. The situation with this environment could be described with the phrase "crocodiles not caught, coconuts won`t grow". After studying free clients in the App Store, we concluded that the choice is incredibly small. The apps we found did not even pass the first round and were not allowed to connect to Tucha. There are two main reasons.
- Poor functionality. The group of clients that deserves such a diagnosis includes the following apps: iRDP, mbDesktop Free, MobiDesktop, HOBLink iWT a, Ahope RDP, RDP Remote Desktop Connection.
- Applications with ads, which can be considered as a potential threat to data security. This group includes the following applications: Remote Desktop-Universal App, iRemoteDesktop Free (also offers to download a game), Mocha RDP Lite, iRdesktop.
So, that is the situation in the App Store.
Test plan: AccessToGo, Parallels Client, and iTap mobile RDP
We decided to follow the beaten track and talk about the capabilities of two already proven free RDP clients: AccessToGo, Parallels Client. We will also take a detailed look at one paid client – iTap mobile RDP, which costs $11.99 (after iTap was acquired by Microsoft, this client changed its name but its functionality remained the same). Testing was conducted on an iPad Mini WiFi.
AccessToGo
- Cost: free.
- Interface language: Russian (but there are shortcomings in the localization, as in previous versions of the app for Android).
- Screen resolution: manual/automatic setting.
- Screen position lock: no.
- Control methods: mouse emulator, touch control, keyboard.
- Supported operating systems: Windows Server 2008/2008 R2, 2012.
- Download link: iOS, Android, BlackBerry, Chrome.
- User manual: here.
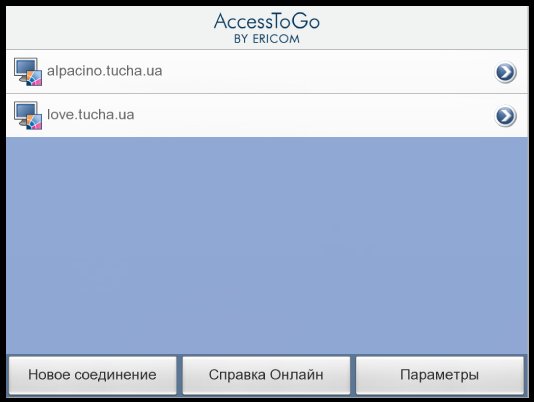
Home screen of the app
All the created connections are displayed here, the main controls are located in the lower part — the buttons "New connection", "Help Online", "Settings". The last button is responsible for setting the parameters of the entire client, not a separate connection.
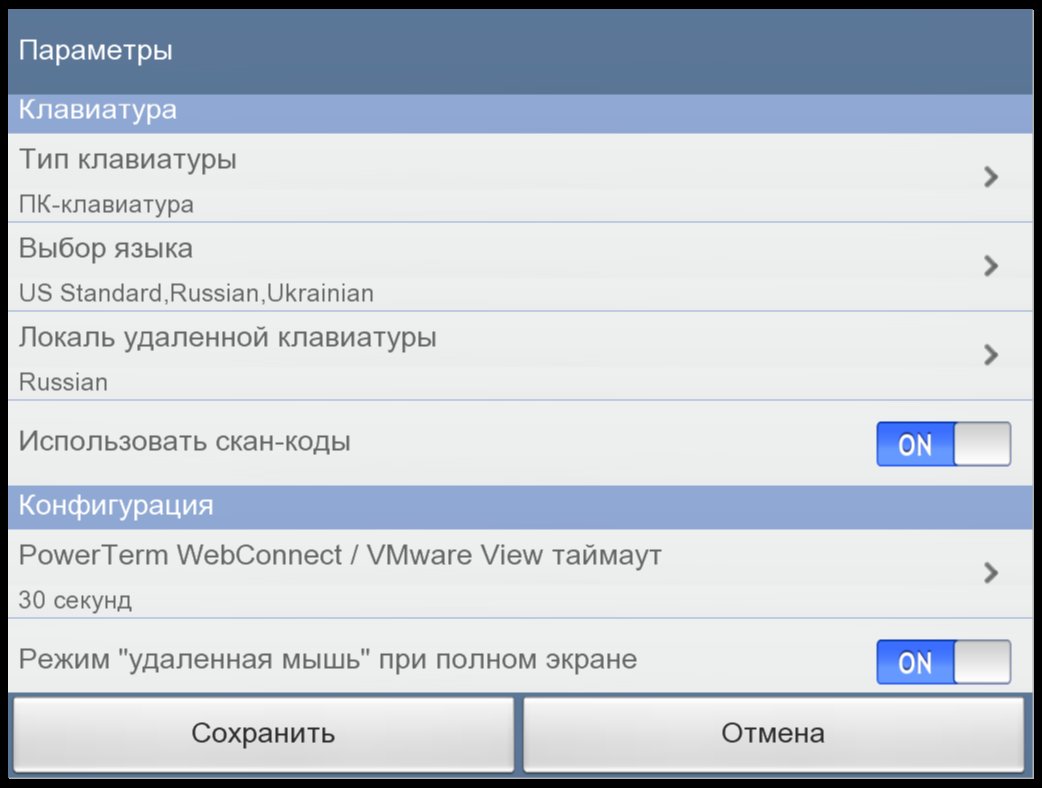
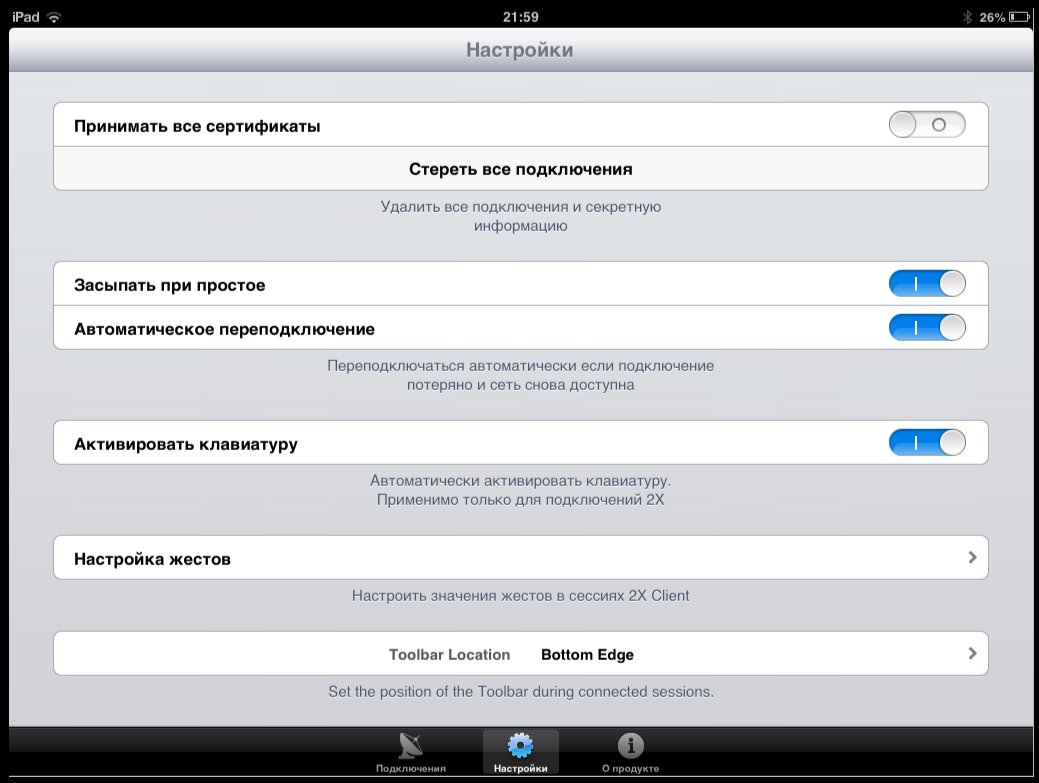
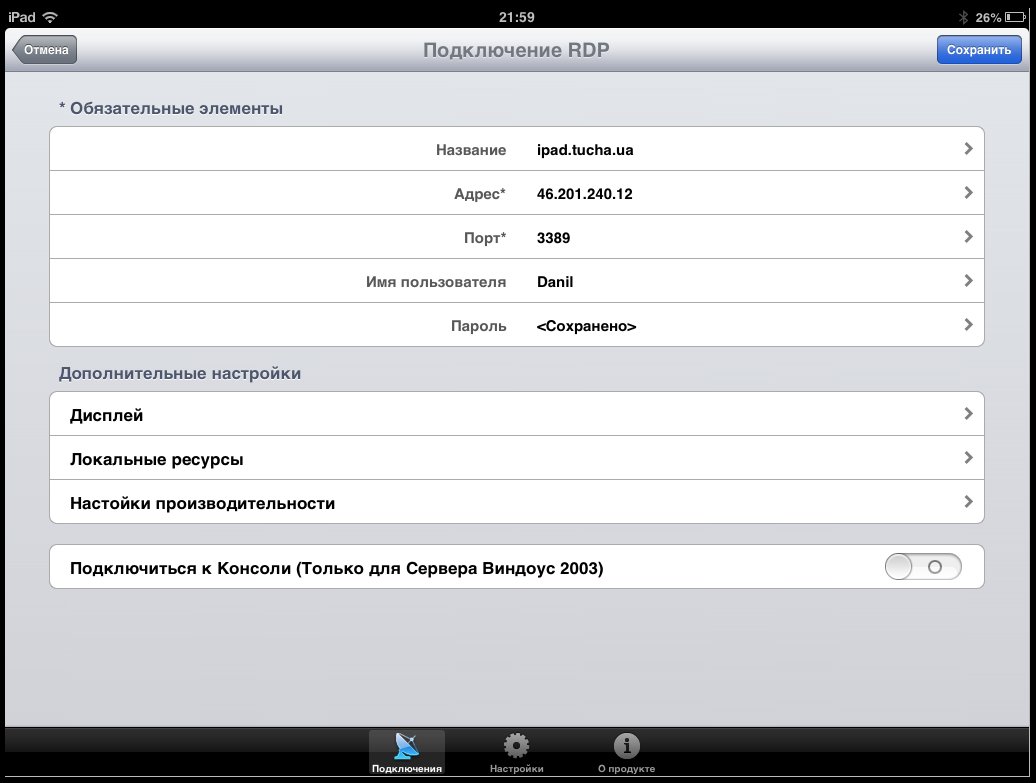
Client settings
The user can change the parameters of each connection and the application in general. However, there are no special or interesting settings in this client.
Let us list the application parameters.
- Keyboard type.
- User interface language.
- Settings for a physical keyboard that is connected to an iPad. But, unfortunately, there is no full-fledged support.
- Enable/disable clipboard sharing between the iPad and a virtual machine.
- Display the lower and upper control panel during a remote session.
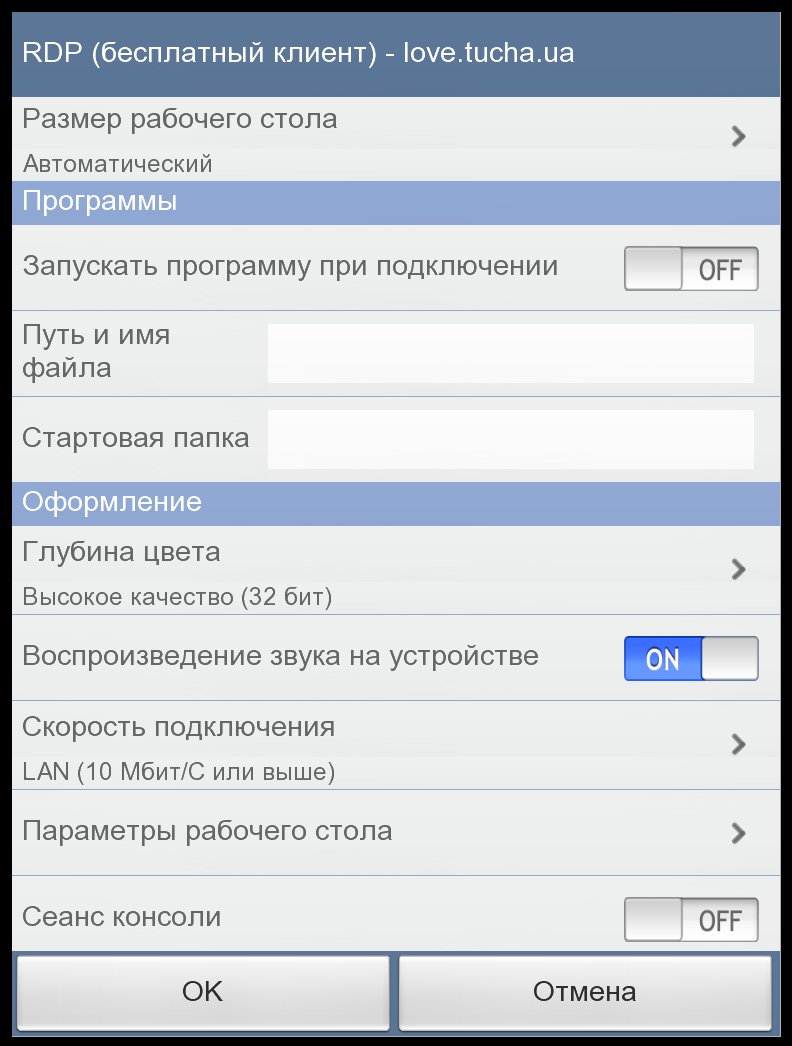
Connection parameters that can be changed.
- A remote desktop size, including automatic detection.
- An application to which the remote desktop connection will be restricted.
- Desktop settings: number of displayed colors, desktop background, font smoothing, Windows theme displaying, visual styles, etc. You can also use one of the ready-made templates for different types of Internet connection (see the "Connection speed" section).
- Enabling the console session.
- Sound playback.
Keyboard
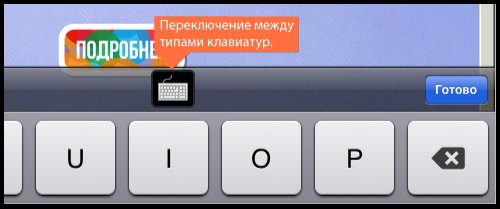
In this client, the user can use a standard device keyboard, a PC keyboard emulation, and a keyboard that contains keyboard shortcuts, function keys, control keys and jump keys.
Switching between keyboard types is done via a control panel, which is fixed at the top of the screen during a remote connection session. Also this panel includes "Esc", "Tab", "Ctrl", "Alt", "Win" key. By the way, using them, you can easily switch between windows by clicking on "Alt", and then on "Tab".
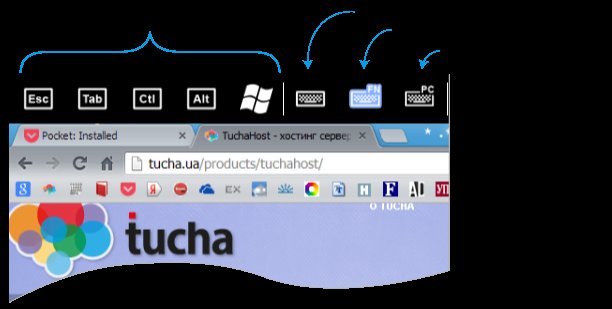
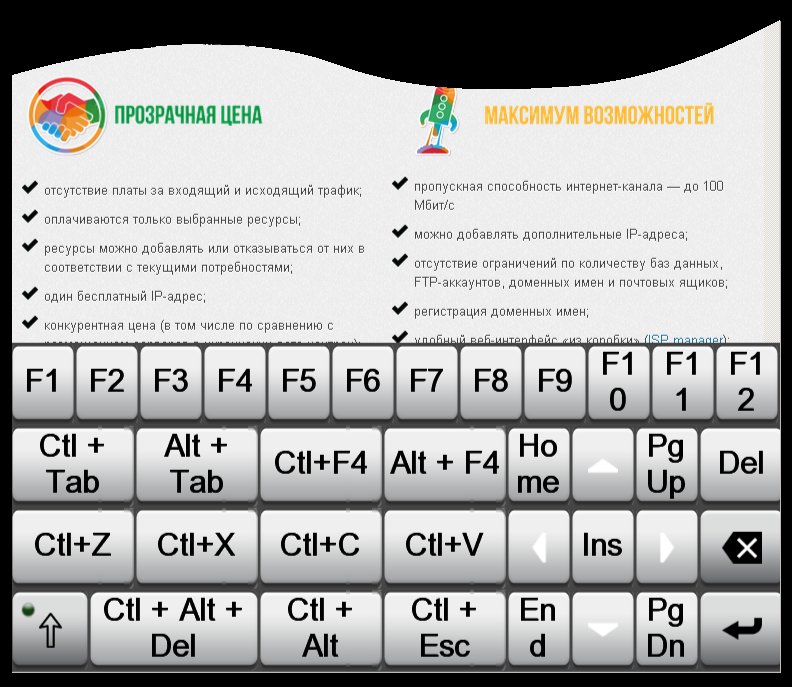
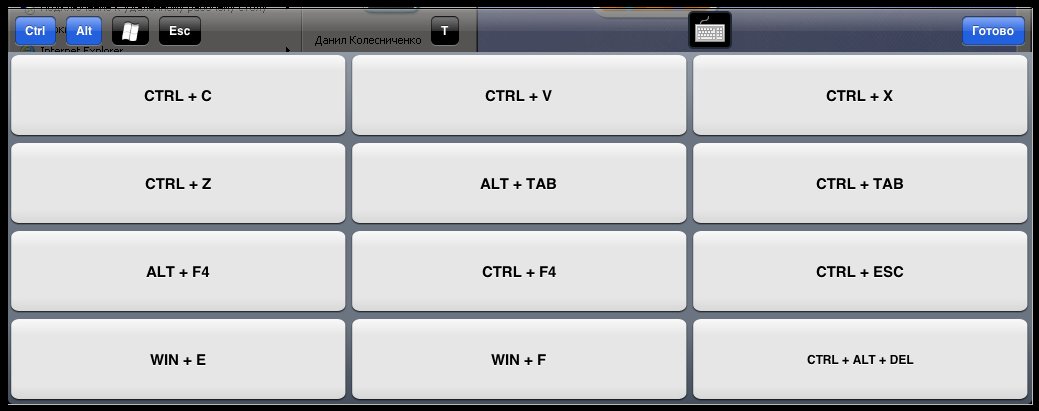
Keyboard with hotkeys
This is a universal keyboard. It is the greatest advantage of this client, as it contains all the keys and keyboard shortcuts that are not present in the standard iPad keyboard, but without which the Windows user’s life will be sad.
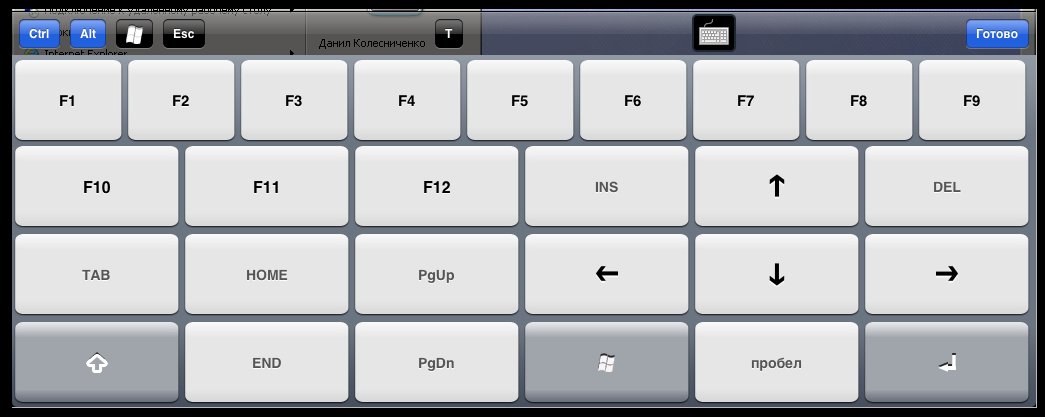
It contains the function keys "F1"- "F12", the transition keys (in everyday language – arrows), and the keys "Home", " PgUp", "End", "PgDn", "Del", "Backspace" and "Enter". They will be appreciated by those who need to make changes to Excel sheets remotely and quickly.
Also, it seems that the keyboard contains all the most popular keyboard shortcuts for Windows.
PC keyboards
Another type of keyboard that is available to the AccessToGo user. It almost completely repeats the standard PC keyboard, except for the absence of some keys, for example, "Caps Lock". The combination "Shift" + "Ctrl", which is responsible for changing the layout in our test Windows, does not work. But the keyboard shortcuts "Ctrl" + "C" and "Ctrl" + "V" work fine. However, it is still more convenient to enter text using the standard iPad keyboard, and to copy and paste, use a keyboard with hotkeys, since due to the small distances, wrong keys are often pressed.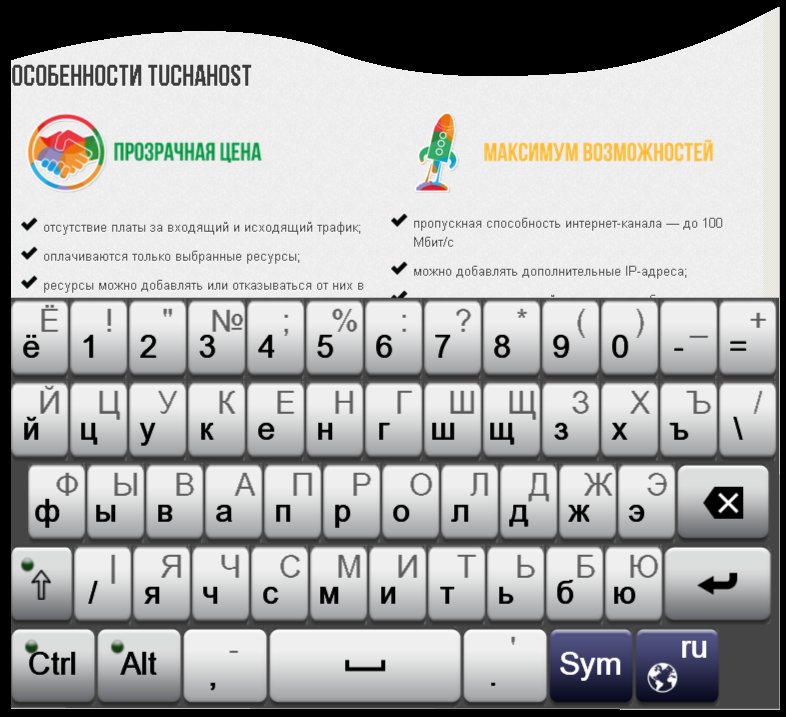
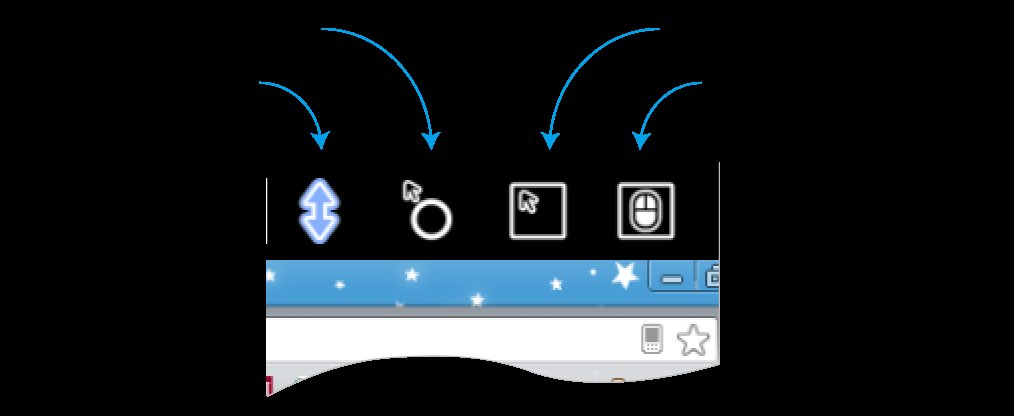
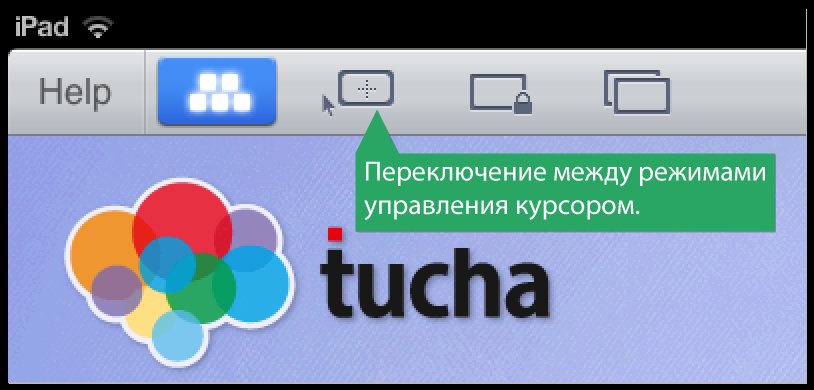
Cursor control
There are four modes that can be used for controlling the cursor during a remote connection session. Switching between them can be done through the panel for changing a keyboard type.
Scroll mode
By switching to this mode, the user can scroll through the pages, but it is not possible to select the text or open a context menu. However, the left mouse button and zooming works.
Mouse emulation mode
The right and left mouse keys work in this mode, and you can also activate and share the scroll mode, remote mouse, and keyboard. This mode is very convenient when working with small elements of the Windows interface.

Cursor mode
This mode is similar to the mouse emulation mode, but it does not activate the additional menu, as in the first mode. Pressing the left key is a double tap, pressing the right key is a long tap, and selecting a separate file is a single tap. To select a group of files or text, you need to tap and hold to select the necessary objects, although it is easier and more convenient to select them by switching to remote a mouse mode.

Remote mouse mode
In this mode, all cursor control is performed via the touch screen: left mouse button – double tap, right button – long tap, selection– tap and select the desired text or group of objects.
Everything is perfectly implemented and works, but to scroll the page, you will need to switch to a scroll mode. Otherwise, you will have to try for a long time to hit exactly the scroll bar.
Conclusion
Advantages of AccessToGo:
- The convenient control panel is available during a remote connection.
- Fixed location at the top of the screen, which eliminates the possibility of accidentally clicking the wrong place.
- Separate buttons for each keyboard type and the mouse mode.
- The presence of the control keys ("Esc", "Ctrl", "Alt", "Tab", "Win").
- The presence of the keyboard with the hotkeys, function keys ("F1" - "F12"), transition keys ("Pg Up", "Home", etc.).
- Sophisticated cursor control system. We were particularly pleased with the mouse emulation mode, which provides a functional menu.
No shortcomings were identified.
Parallels Client
- Cost: free.
- Interface language: Russian.
- Screen resolution: manual/automatic setting. You can also choose the screen orientation – portrait or landscape.
- Screen position lock: no.
- Control methods: mouse emulator, touch control and hot gestures, keyboard.
- Supported operating systems: Windows Server 2008/2008 R2.
- Download link: iOS, Android.
- User manual: here.
Home screen of the app
On the main screen of the app, there is absolute minimalism. Here is a list of created connections and the controls – "Add connection", "Edit", "Edit", "Settings". Neither grouping nor searching for created connections are implemented in this RDP client.

Client settings
Parallels Client has a minimal set of configurable parameters. The user can configure both the application itself and each connection separately, which is typical for all clients. So, here is what we can do in Parallels Client.
- Adjust the color depth, screen size, and select the screen orientation.
- Change graphics settings: desktop background, font smoothing, menu animation, etc.
- Create and modify "hot gestures".
Create and edit hot gestures
When testing this client for Android, we admired this option, as it allowed us to create keyboard shortcuts for key combinations, for example, "Alt" + "Shift" + "Tab" or "Ctrl" + "Alt" + "Del". In the iOS version, there are no such amenities. The user can assign actions such as show or hide the keyboard, scroll the page, etc. But they are less needed than the Windows hotkeys available in one or two touches. Opening the task manager in a remote session in Parallels Client remained a mystery to us. The client supports hot gestures for one, two, and three-finger taps.
Keyboard
In the Parallels Client, as in AccessToGo, the user has access to several types of keyboards – a standard device keyboard, a keyboard with the hotkeys, and a keyboard with the function keys ("F1" - "F12") and transition keys.
Switching between the types is performed using a button on the panel, which is located above the keyboard. This solution is terribly inconvenient for the user. Each time you need to make extra movements to activate a different type of keyboard. Moreover, the button does not switch to the next keyboard type, but only opens the panel where a keyboard type can be selected.
Keyboard with hotkeys
On it, the user will find almost all the necessary keyboard shortcuts – "Ctrl" + "Alt" + "Del", "Ctrl" + "C", "Ctrl" + "V". We were glad to see the presence of "Win" + "E" and "Win" + "F", which other developers of RDP clients ignored.
But, in general, a similar keyboard in AccessToGo is implemented more conveniently, since, in this client, the keyboard with the hotkeys contains the transition keys and function keys, which makes the process of editing, for example, a large Excel sheet, simpler and easier.
Special keys
In this mode, the user can use the control keys ("Win", "Ctrl", "Alt"), function keys ("F1" - "F12") and input keys ("Shift", " Space", "Enter").
Conclusion
Unfortunately, here we will have to start with the disadvantages.
Disadvantages:
- A small number of parameters that the user can configure.
- Improper placement of the control panel. It is located at the bottom of the screen, and partially covers the taskbar in Windows, which leads to unwanted clicks.
- Hot gestures are present, but they are not as beautiful as in the Android version. First, not all gestures can be changed by the user. And, secondly, it is not possible to assign them the hotkeys.
- Disgusting switch between keyboards. Too many movements are required to do one simple action – change the keyboard type.
Advantages:
- There is the keyboard that contains all the most popular keyboard shortcuts, including "Win" + "E"," Win" + "F".
- There are hot gestures that can be partially customized.
iTap mobile RDP
- Cost: $11.99.
- Interface language: English.
- Screen resolution: manual/automatic setting.
- Screen position lock: yes.
- Control methods: mouse emulator, touch control and hot gestures, keyboard.
- Supported operating systems:
- RDP: Windows Server 2003 and 2003R2, Windows Multipoint Server 2011 and 2012, Windows Small Business Server 2003, 2008 and 2011.
- Remote Desktop Gateway: Windows Small Business Server 2011, Windows Server 2008, 2008R2, and 2012.
- Remote Web Access or Remote App services: Windows Server 2008R2 and 2012.
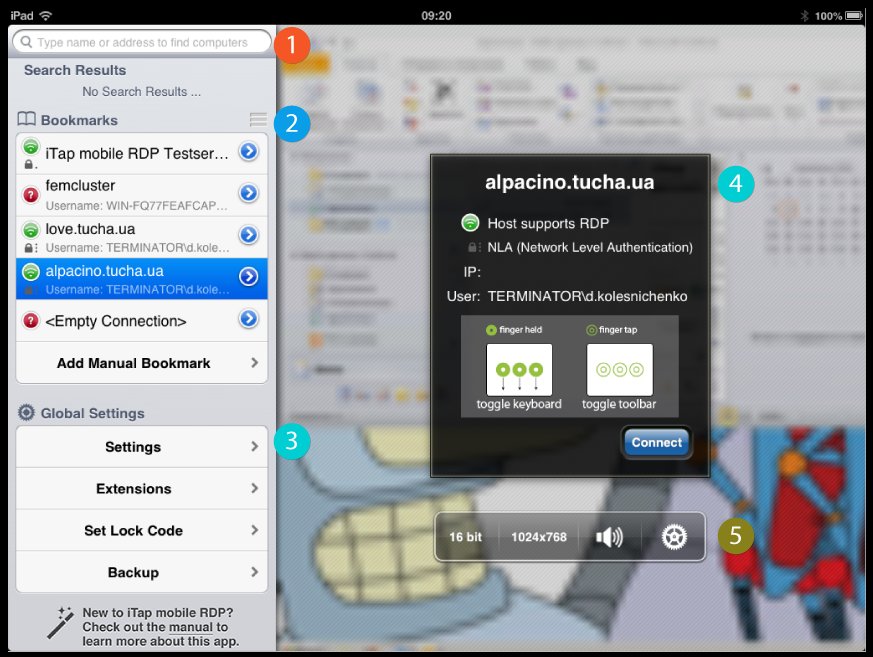
Home screen of the app
It pleasantly surprises with its thoughtful placement of elements and functions. The entire screen is divided into left and right parts. The first one contains the main controls and a list of created connections, and the second one displays information about the selected connection.
Note: Backups are stored locally, so deleting the app will delete all the backups. To avoid this, you must save a copy via iTunes before uninstalling the RDP client.
- 1The search field for the created connections. You can search by the following parameters: computer name, domain name, IP address.
- 2The list of created connections "BookmarkS". It displays the name of the connection and the availability of a particular virtual machine. Unfortunately, connections cannot be grouped or sorted by any parameters. You can only change their display order.
- 3General settings "Global Settings". Here you can change the settings of the RDP client, make a backup copy of the created connections, and set password protection to restrict access to the application. You can also configure several extensions: RD Web Access, Leostream Support, LineaPRO Barcode Scanner. The user interface of the RDP client can be configured through the corresponding menu, which is hidden in the iPad settings.
- 4Summary information about the selected connection: connection name, security level, virtual machine status, IP address, user.
- 5A control panel that allows you to change the color depth, screen size, and enable/disable audio redirection from the virtual machine to the iPad without going to the settings.
Client settings
The user can configure the client exactly as they want. There are many options available for configuring the application and the connection itself separately. Here are the most interesting features.
- Configure an automatic connection to a selected virtual machine after each launch of the application.
- Manage certificates and CAL licenses.
- Activation of the optimization mode for 3G networks.
- Configuring the security level: NLA, TLS.
- Managing user accounts.
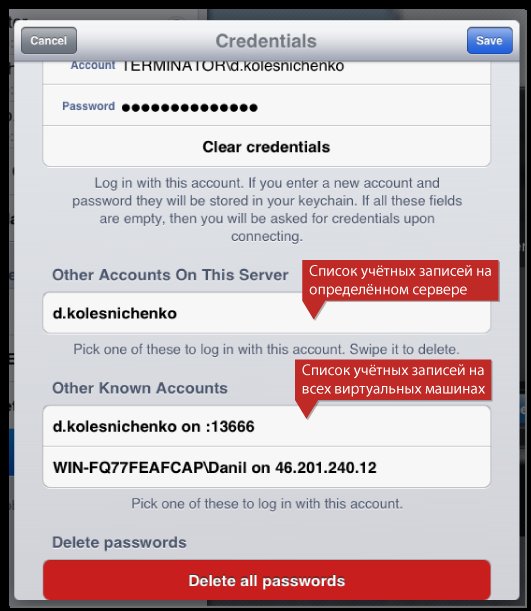
Managing user accounts
It is worth telling a little more about this wonderful opportunity. Its essence lies in the fact that the RDP client stores all the credentials that you entered. You can use them when creating new connections, for example, if the same user is created on all the virtual machines, you do not need to re-enter the data, just select an account from the list when creating a new connection. There are two lists in the app: the first one stores different accounts for one specific server, while the second one stores the accounts from all the virtual machines. If necessary, all users, passwords, and information can be deleted.
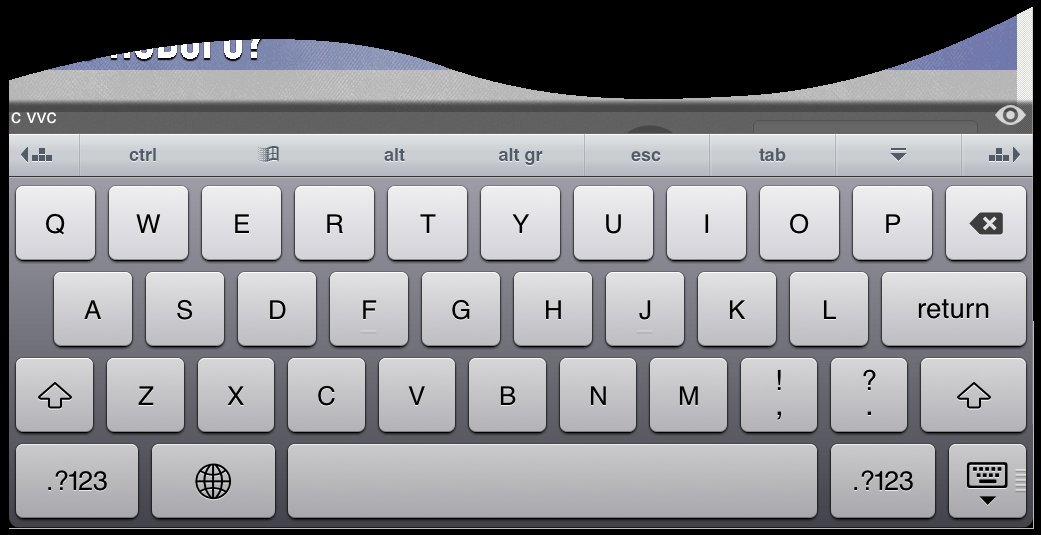
Keyboard
In this client, only the built-in keyboard is available, which is supplemented with the keys "Ctrl", "Win", "Alt", "Alt gr", "Esc", "Tab". But, unfortunately, the usual and popular combinations "Ctrl" + "C" and "Ctrl" +" V " do not work, only switching between windows via "Alt" + "Tab".
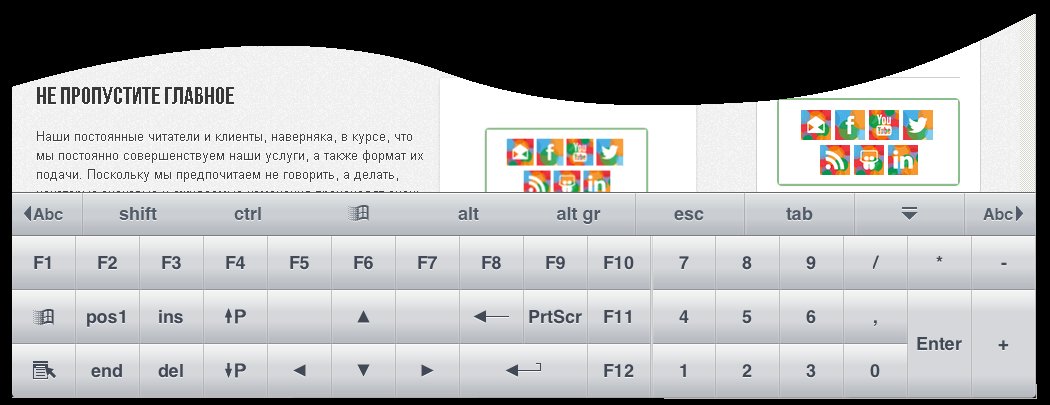
Also in this client has the keyboard type which contains: function keys ("F1" - "F12"), transition keys (in everyday language – arrows), control keys ("Ctrl", " Alt", " Win", etc.) and a numeric keyboard. After switching to this mode, you can perform "Ctrl" + "Alt" + "Del", "Alt" + "F4".
Cursor control
This client has three cursor control modes (Scope Mode, Pointer Mode, Draw Mode) and its own hot gestures for each of them. Switching between the modes is carried out through the panel that is displayed at the top of the screen.
Scope Mode
This mode is set by default. In it, the left mouse button is a double tap with one finger, the right mouse button is a single tap with two fingers. To select a group of objects, tap twice with one finger and start selecting. To scroll the page, you need to touch it with two fingers and move them up or down.
Also in this mode, you can activate an on-screen magnifier for more precise cursor control. To do this, you need to tap the screen with your index finger, holding it in one place for a short period of time, and without taking it off, start moving it across the screen. As a result, the magnifier will appear. To press the left mouse button without releasing the index finger, make one touch with the other free finger. Pressing the right key is a single touch with two other free fingers.
Pointer Mode
In this mode, the mouse cursor is constantly displayed, which can be controlled with one finger. In this case, pressing the left key is a double tap with one finger, and pressing the right mouse button is a single tap with two fingers. For example, to select a group of objects, you need to tap with one finger and start selecting the necessary objects without taking the finger off the screen. And to scroll the page, you need to tap with two fingers and move them up or down. The magnifier does not work in this mode.
Draw Mode
This mode allows you to use only the left mouse button, so it is perfect for selecting the text, folders, and other objects.
Горячие жесты
For user convenience, there is a set of hot gestures that allow you to make working with the RDP client comfortable. Unfortunately, you cannot change the gestures. The full list of hot gestures for different modes can be found in the official user guide for iTap mobile RDP.
Here are the universal gestures that work in all modes:
- Swipe with three fingers from left to right will complete the connection.
- A single tap with three fingers – show/hide the control panel.
- Three fingers down – show/hide the on-screen keyboard.
Conclusion
Let us talk about the advantages and disadvantages of the paid and most expensive RDP client.
Advantages.
- The presence of different parameters allows you to fine-tune the client to the needs of the user.
- A useful feature for managing user accounts. It is very useful for administrators who manage a large fleet of virtual machines.
- Backup function for created connections.
- Ability to set the password protection.
- The app's well-designed main screen includes small but nice features – virtual machine availability, quick access to the most important settings, virtual machine sorting list, and a search function.
- The convenient control panel is available during a remote session.
- The lock screen mode. It is useful when scaling and working with tiny elements of the Windows interface.
- The presence of hot gestures.
Disadvantages:
- The keyboard. It has everything, but developers could add a keyboard with hotkeys, like AccessToGo or Parallels Client.
The main thing is to make the right choice
I want to start, of course, with the conclusion – think carefully about buying a device with iOS, if you need to connect via RDP. Our subjective opinion is that Android is the better choice. And here is why:
- There is no way to connect a tablet drive on a device running iOS.
- You cannot connect any devices via USB. For example, Android did a great job of forwarding a removable hard drive into Tucha. In iOS, there is no such option.
- There is no full support for a physical keyboard, even in the paid iTap mobile RDP.
- The functionality of RDP clients is behind their Android counterparts. Parallels Client is a prime example of this. For example, the ability to assign certain types of touches to Windows keyboard shortcuts makes working with the virtual desktop more convenient and simpler.