How to set up a client-to-site VPN in the cloud
- Home
- Blog
- Instructions
- How to set up a client-to-site VPN in the cloud
Safety is paramount. Configuring a secure connection to servers via VPN (Virtual Private Network) is one of the most popular tasks assigned to us by our clients. In fact, everything is very simple, and you can easily cope with it independently.
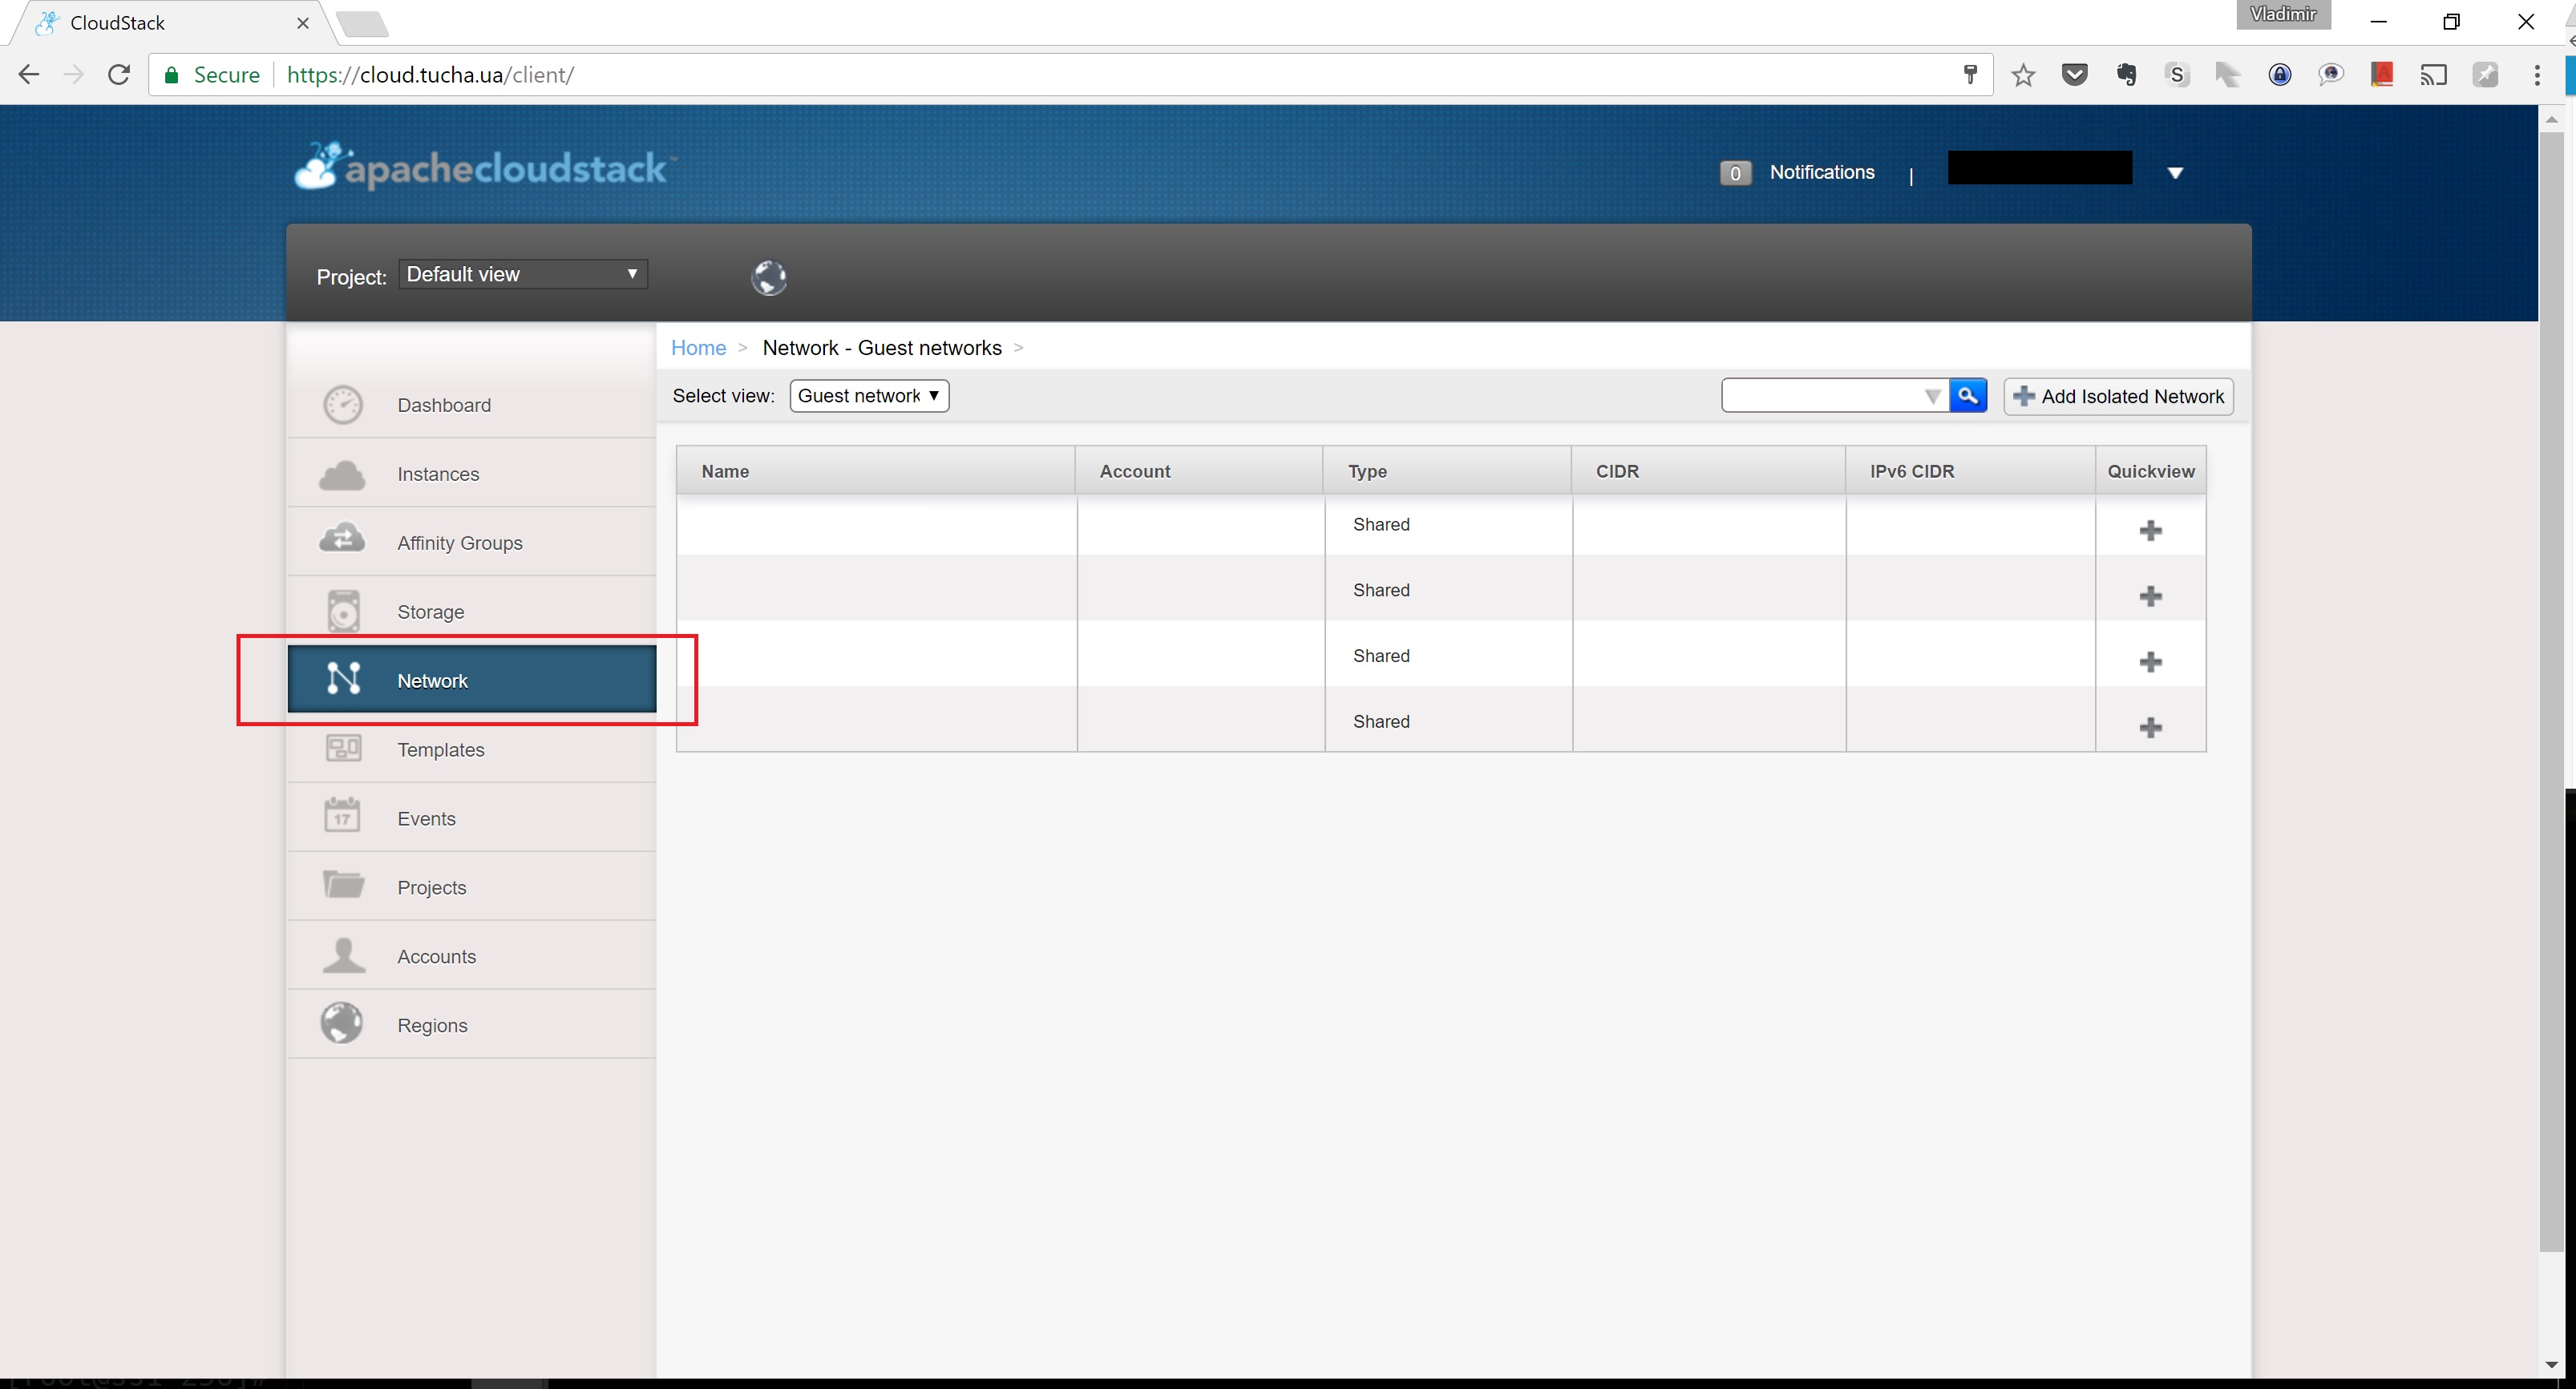
1. Log in to the Apache CloudStack administrative panel under your account details and open Network.
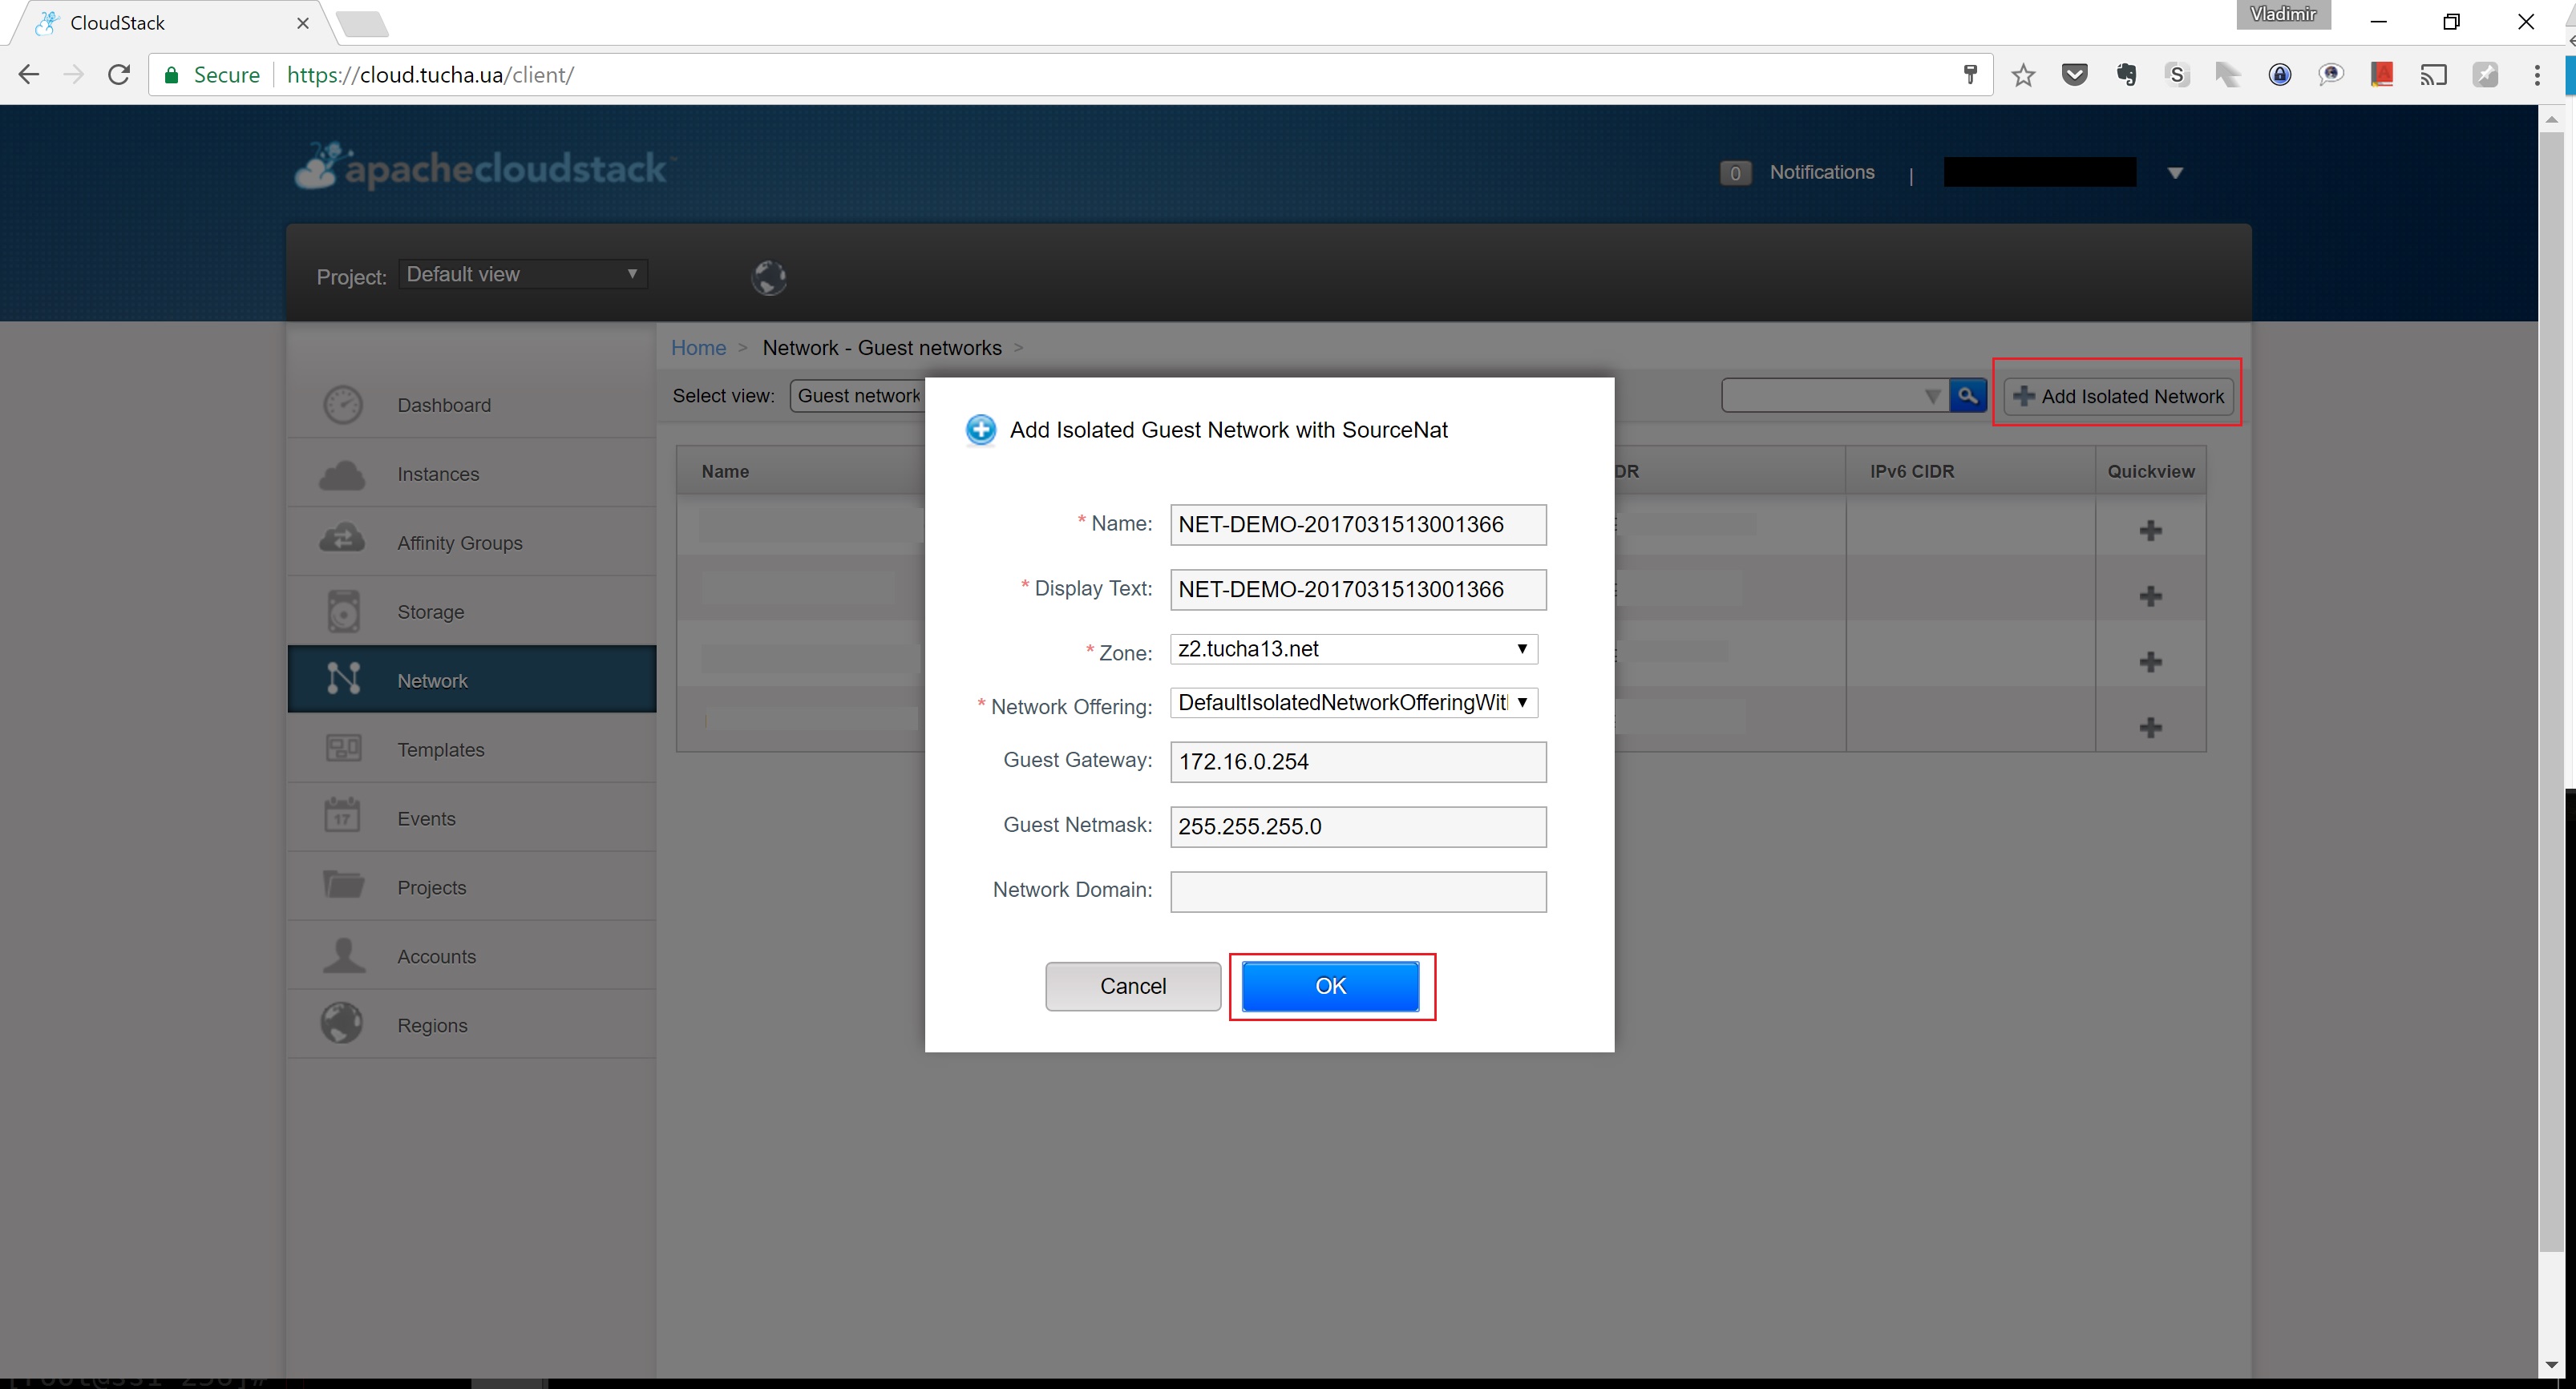
2. Add a new network by clicking Add Isolated Network. Fill in all the fields and click OK.
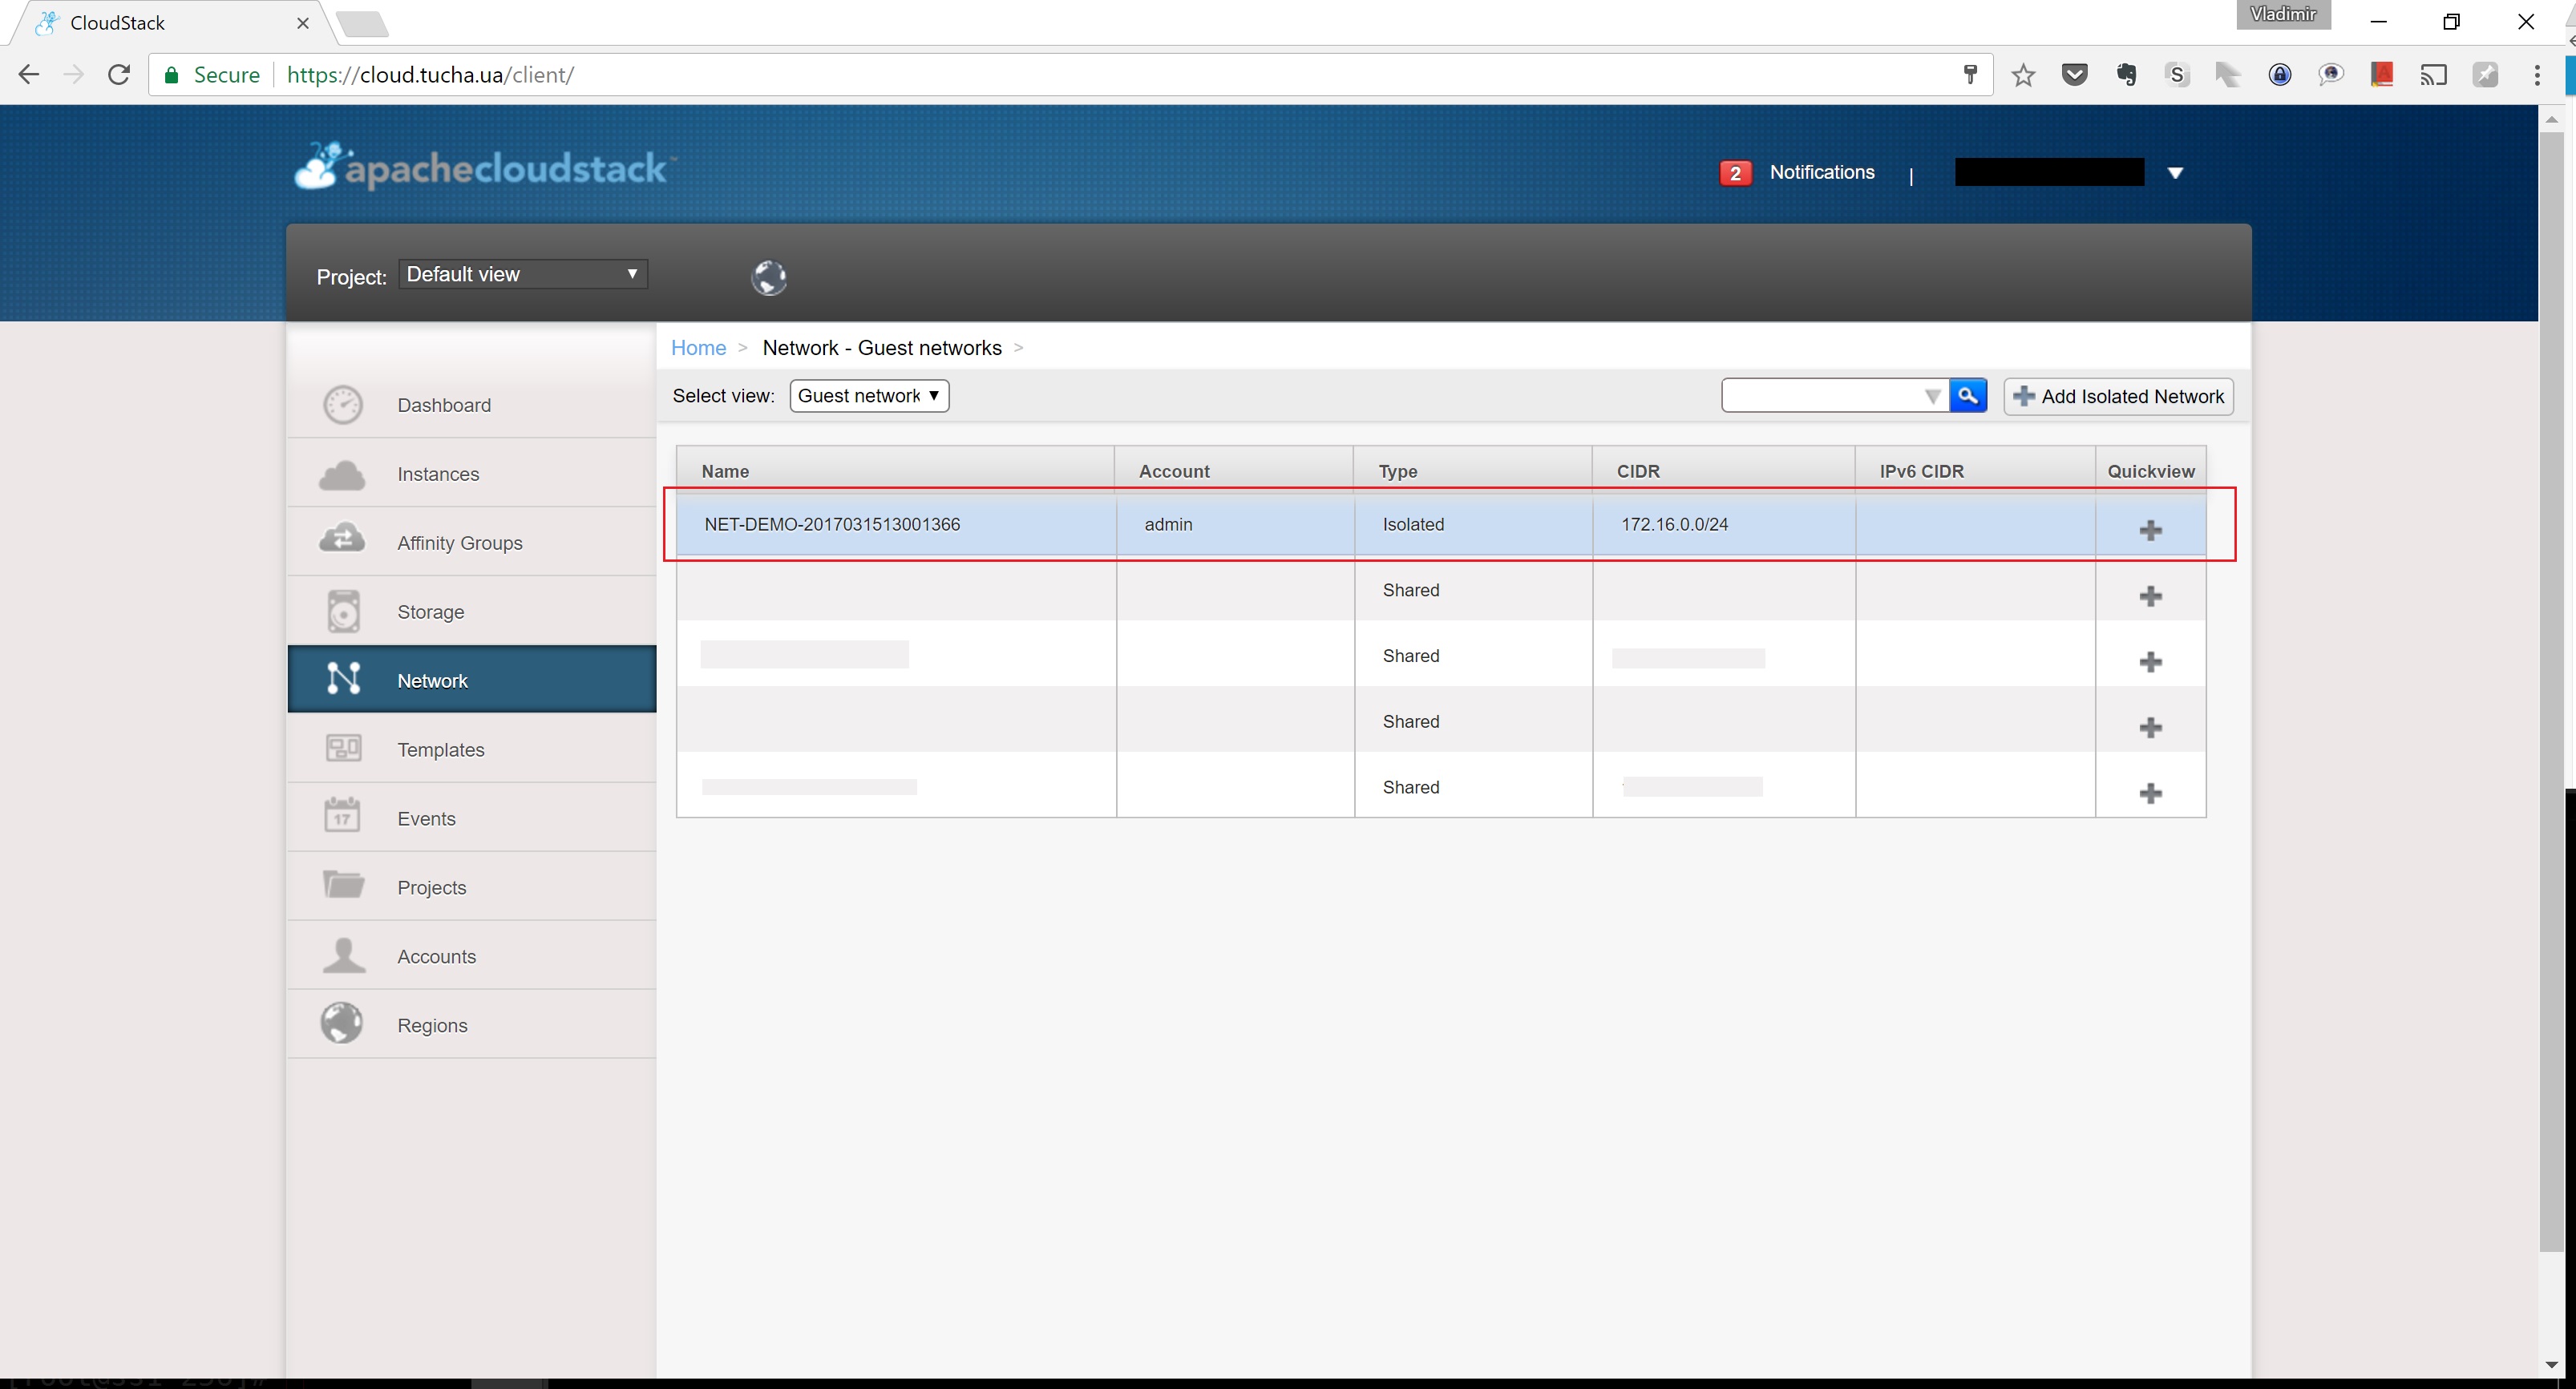
The network has been created, and now it is displayed in the list of networks.
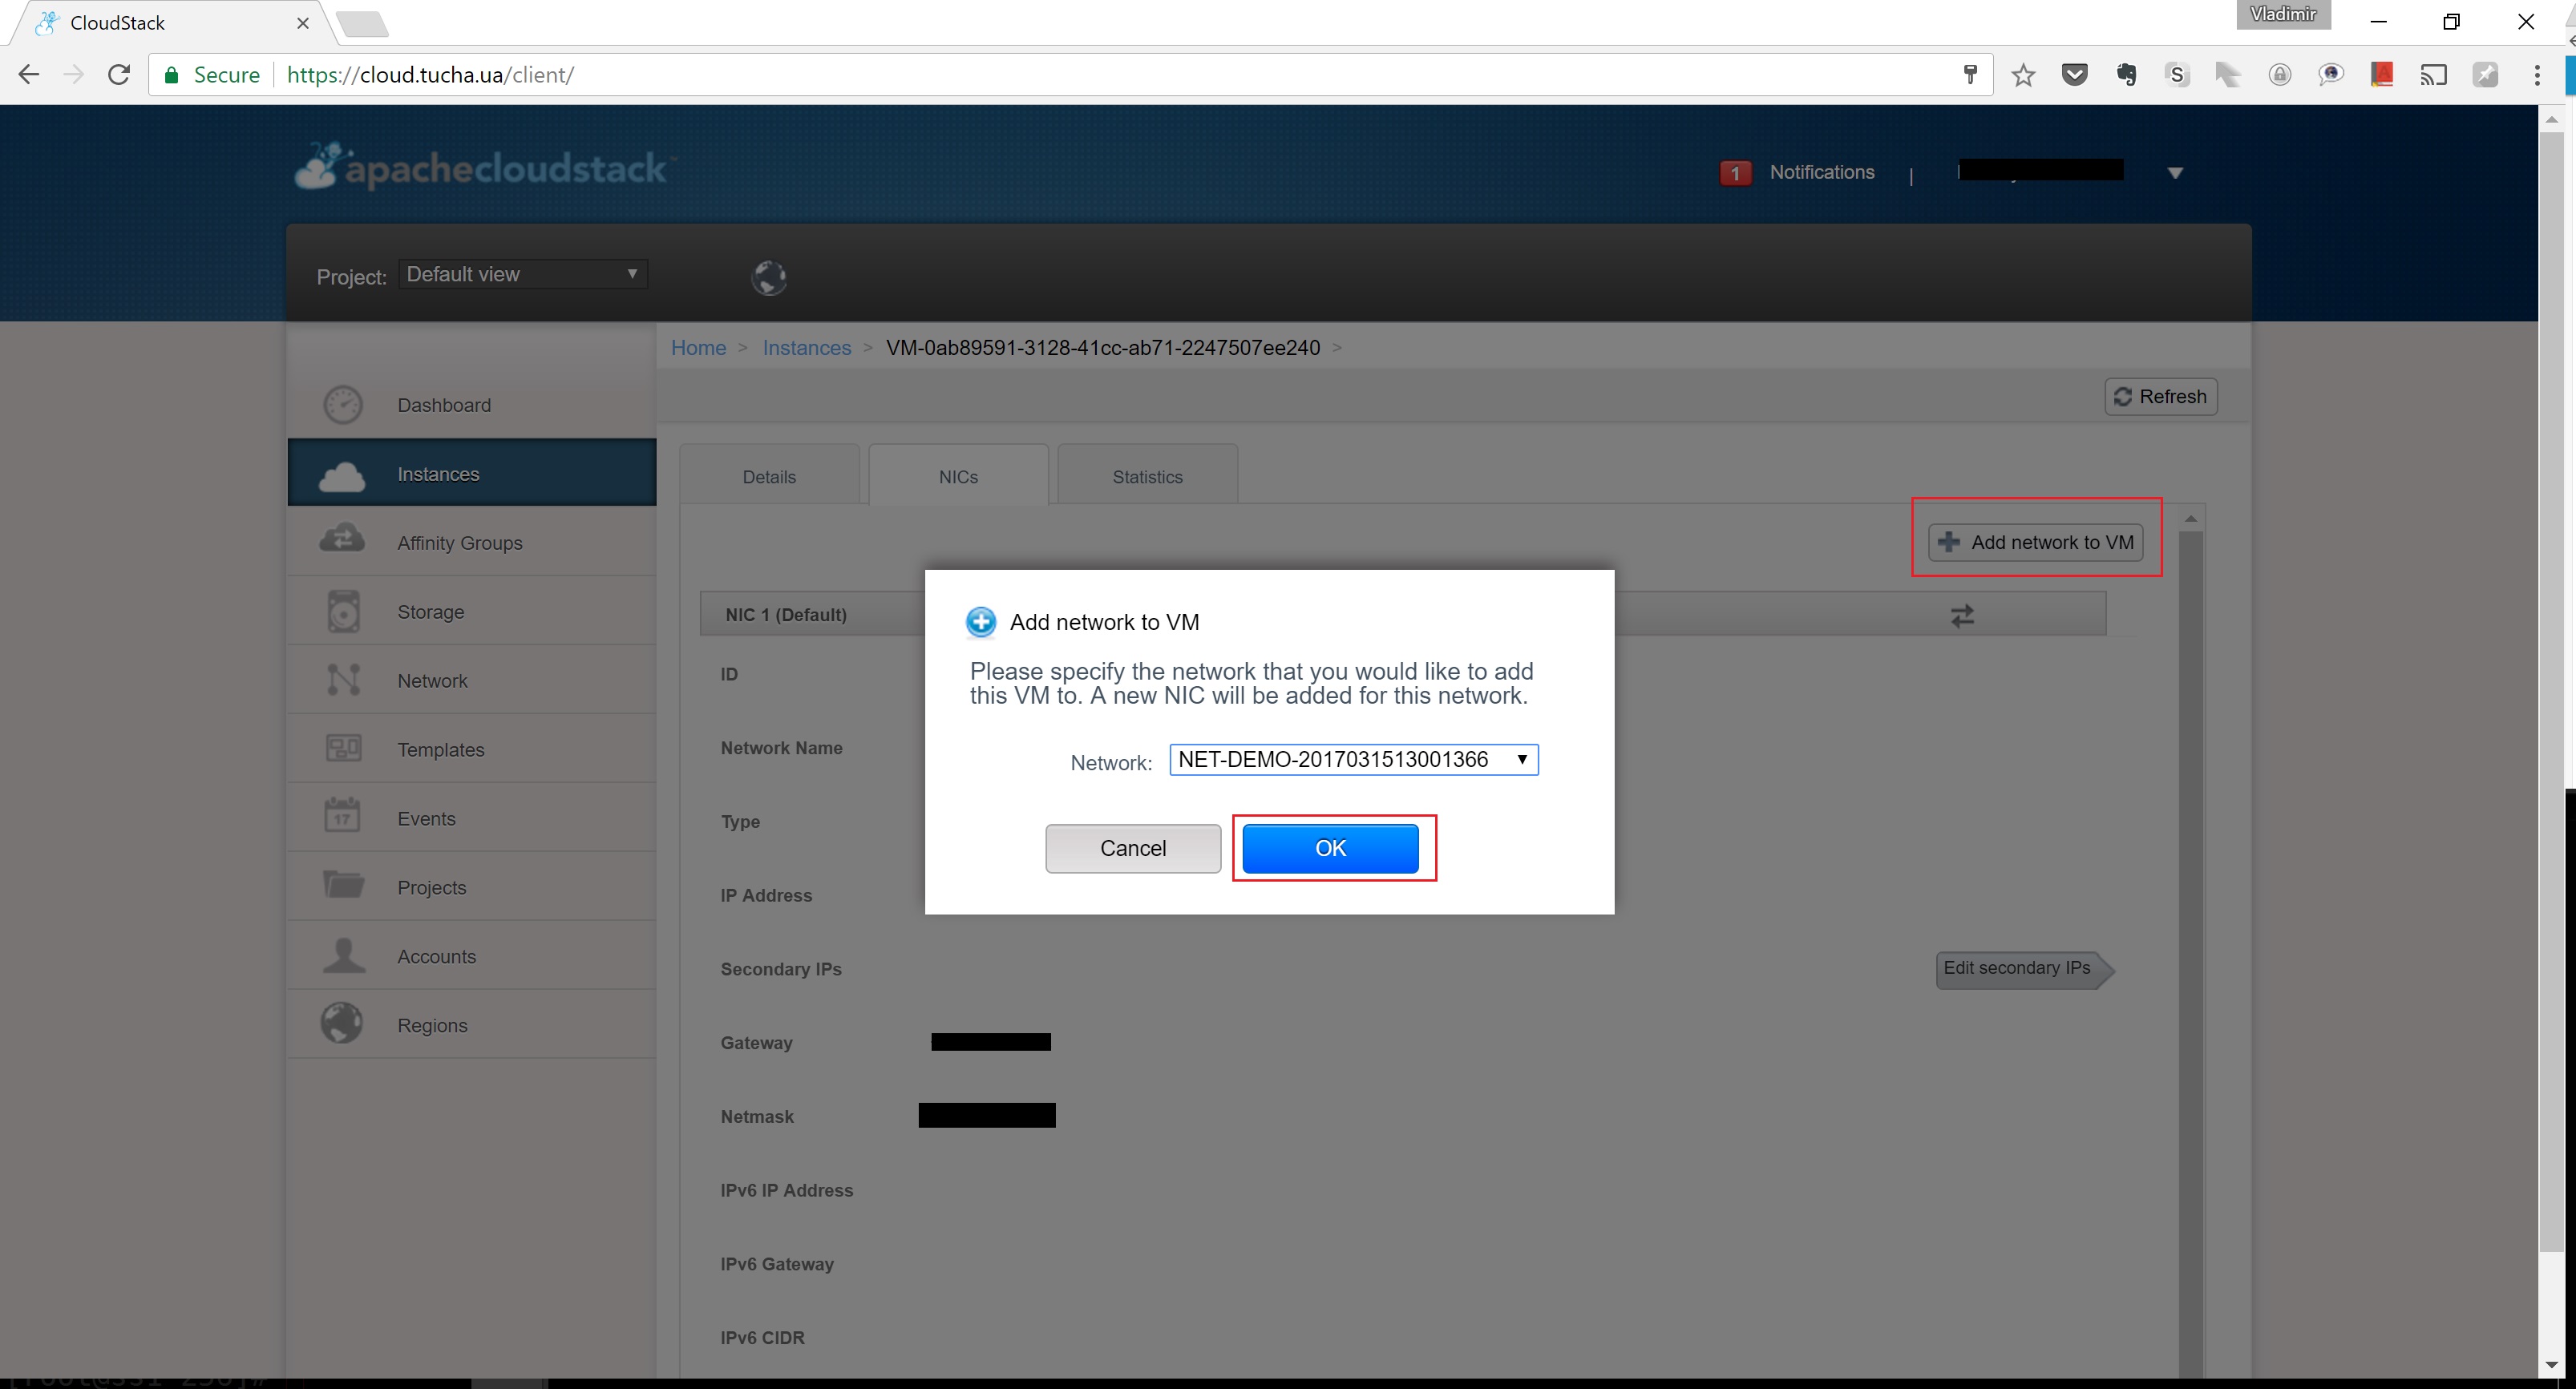
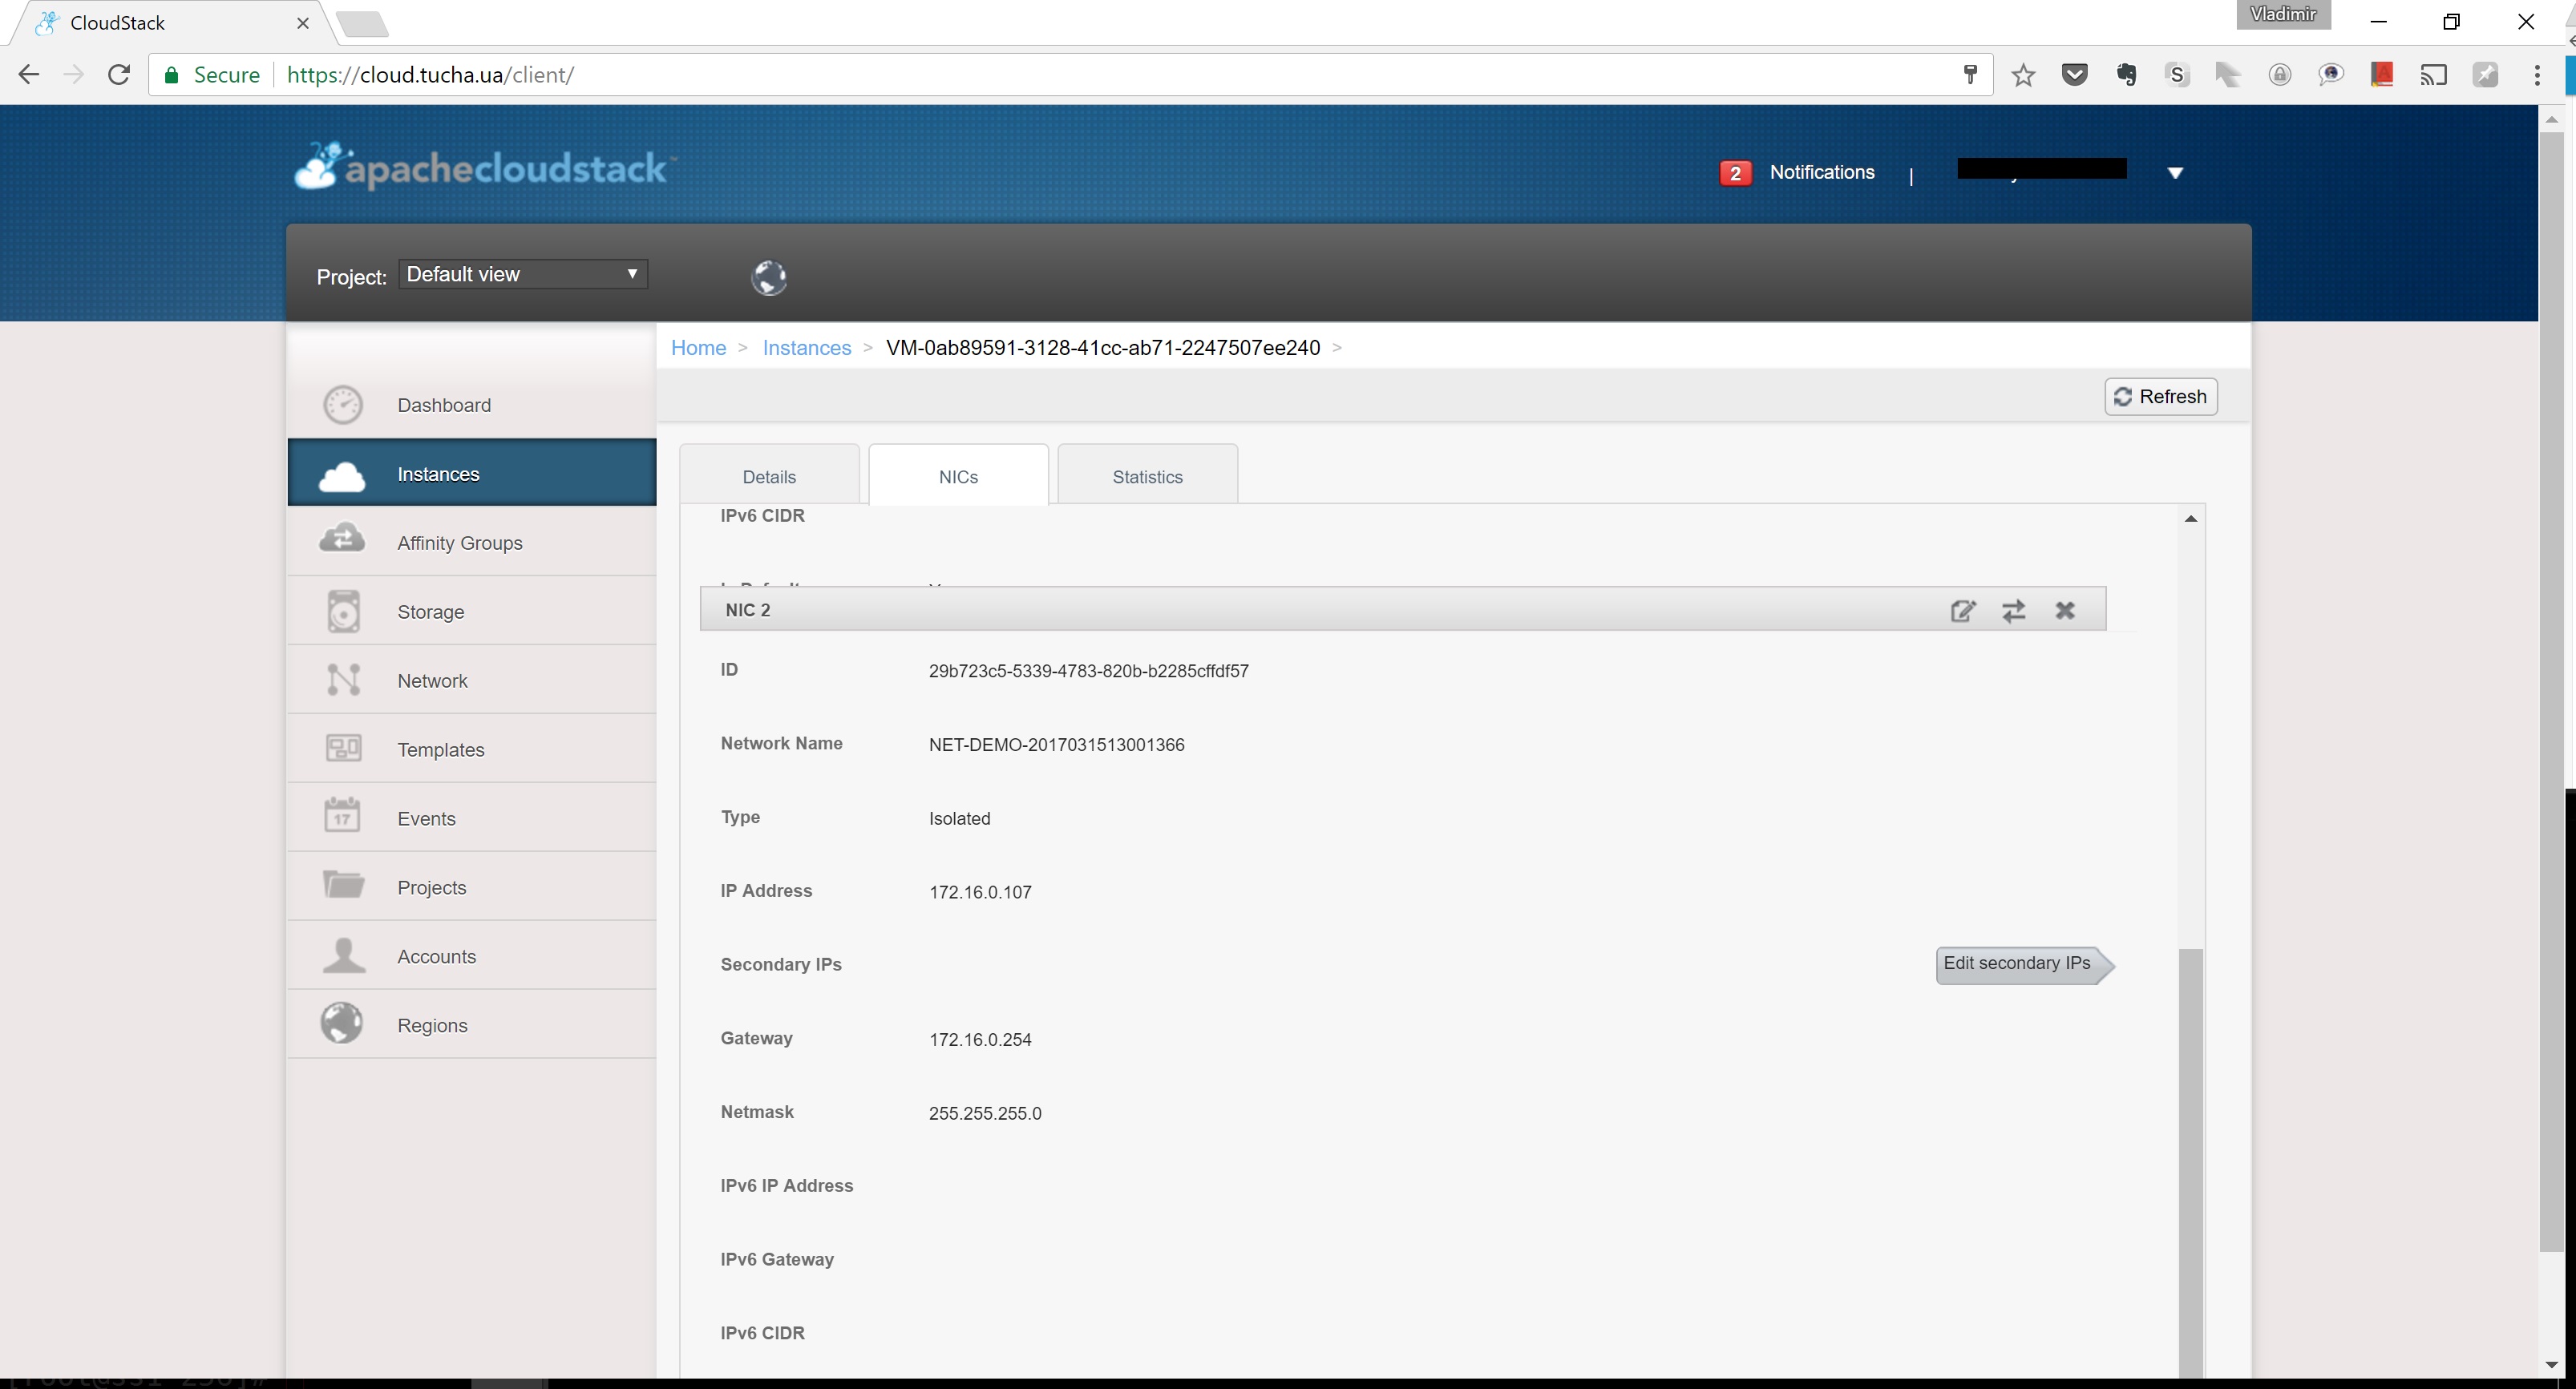
3. Go to Instances, select a virtual machine, and open NICS.

4. Tap Add Network to VM and OK.
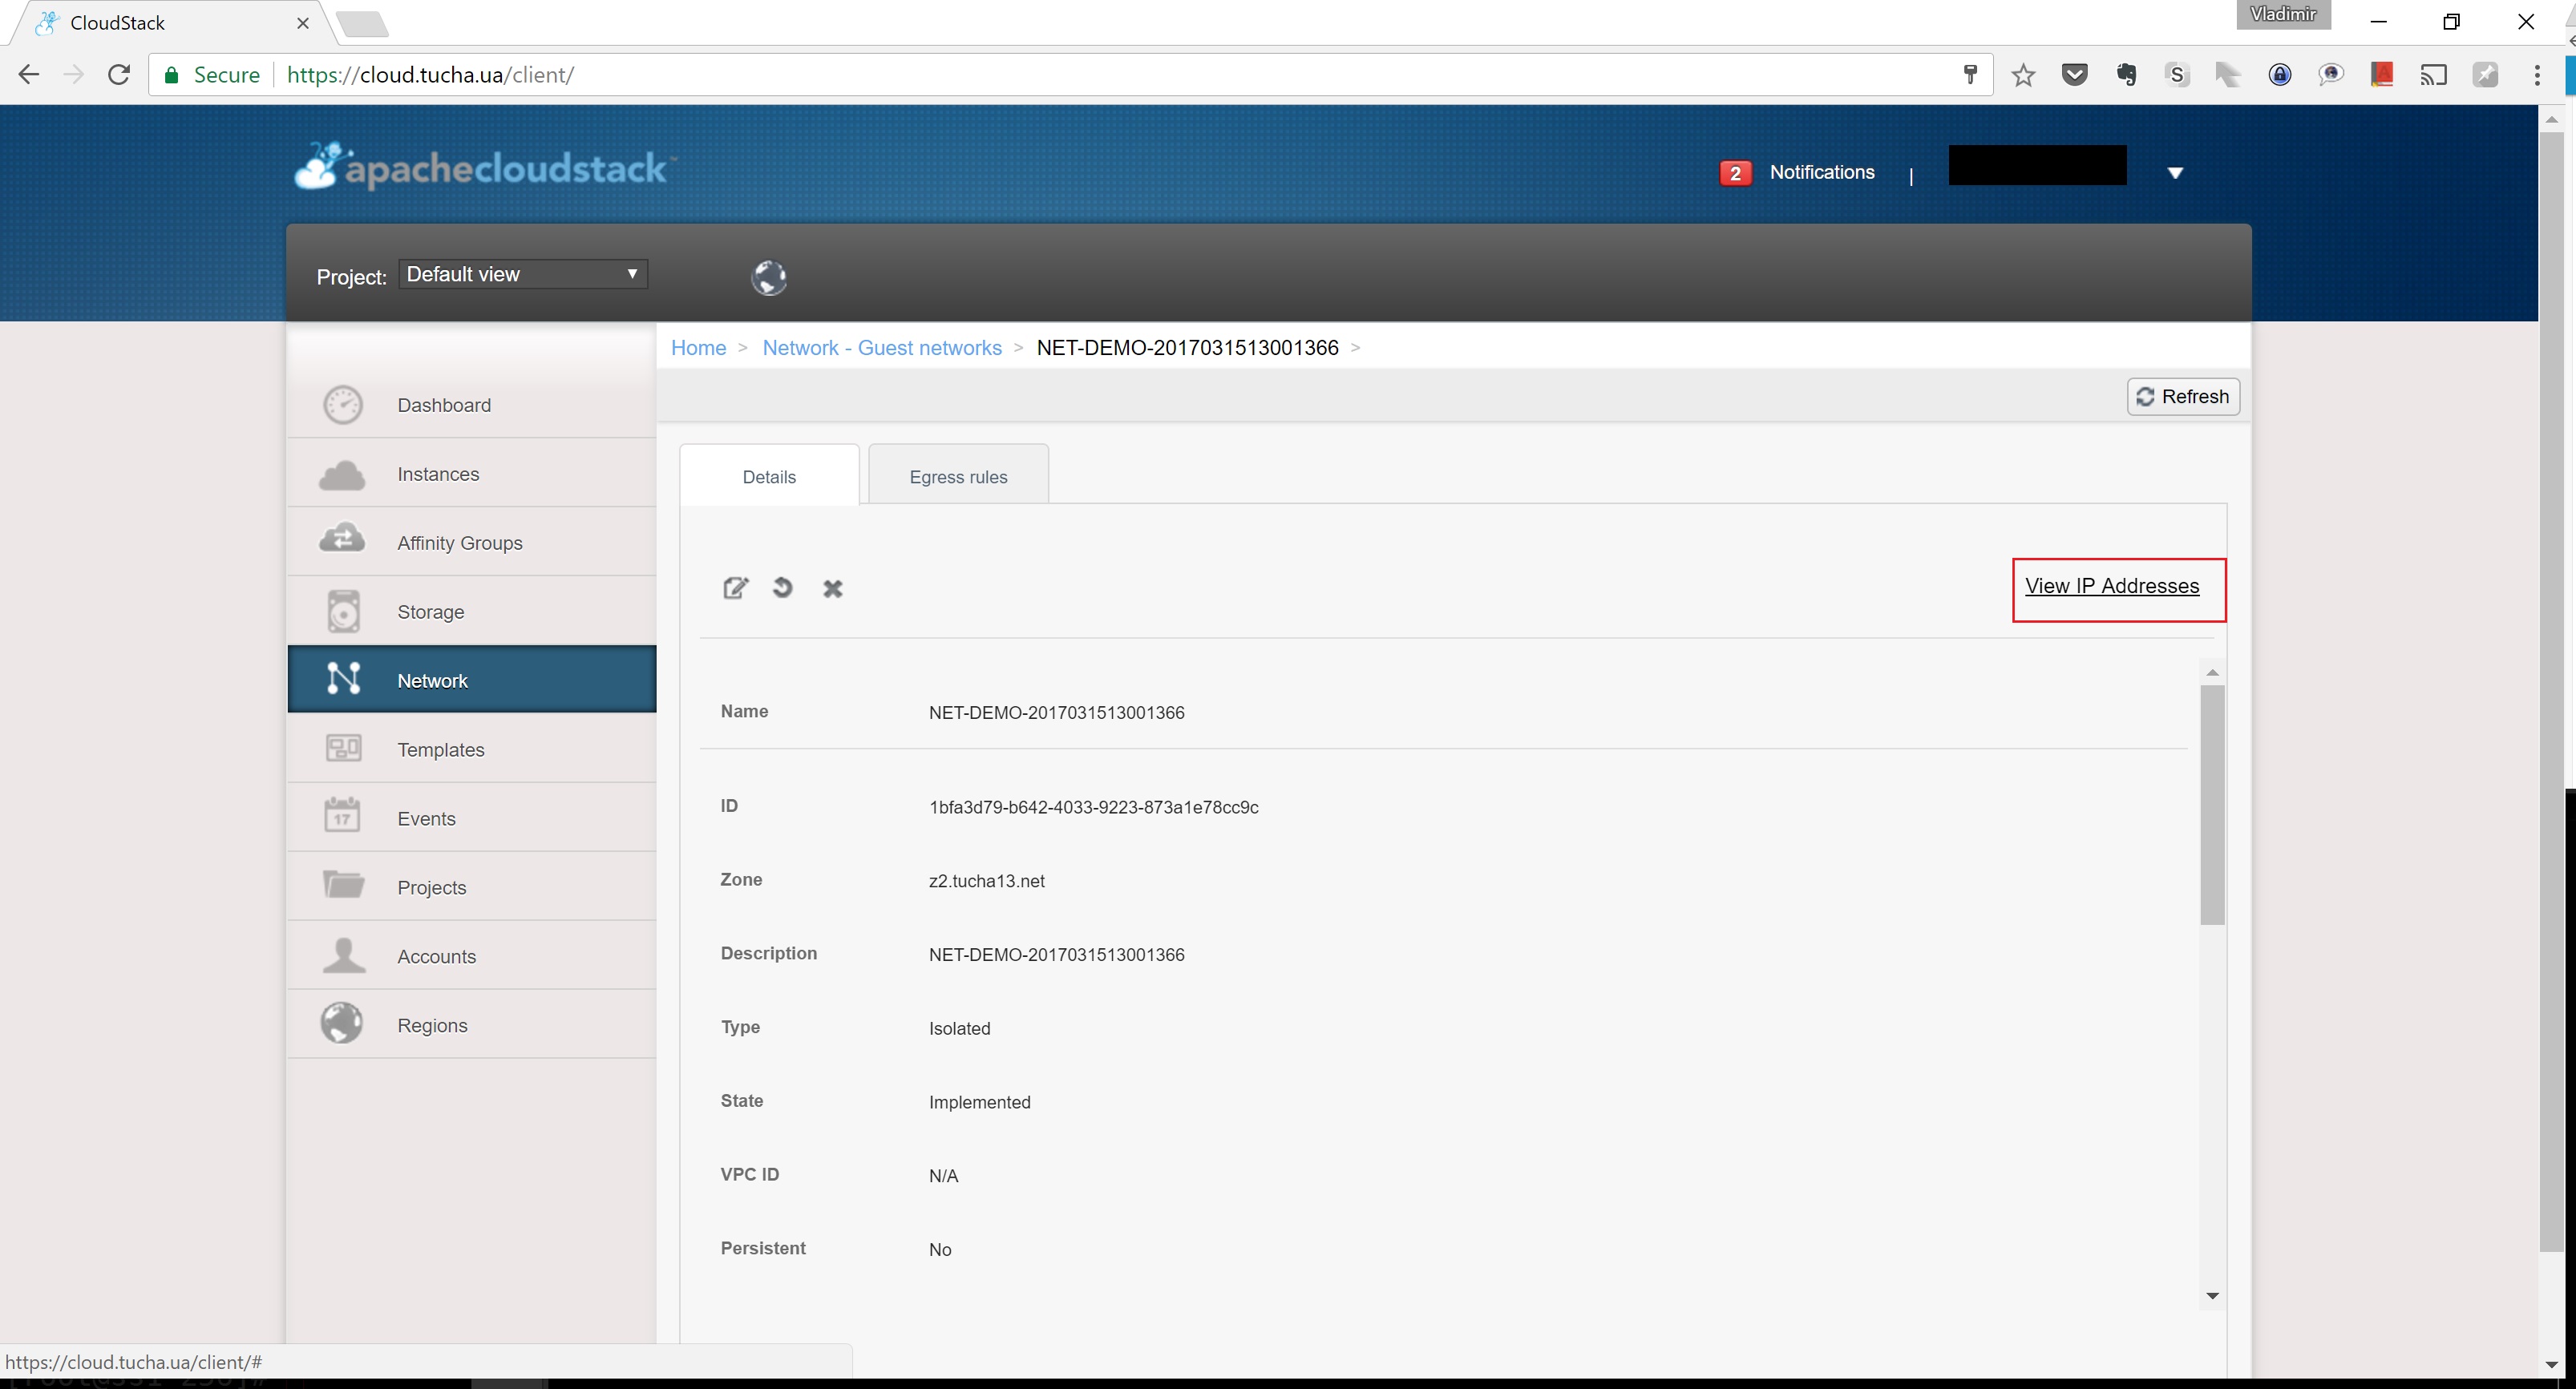
5. Open the parameters of the created network and click View IP Addresses to open the list of external IP addresses associated with this network.
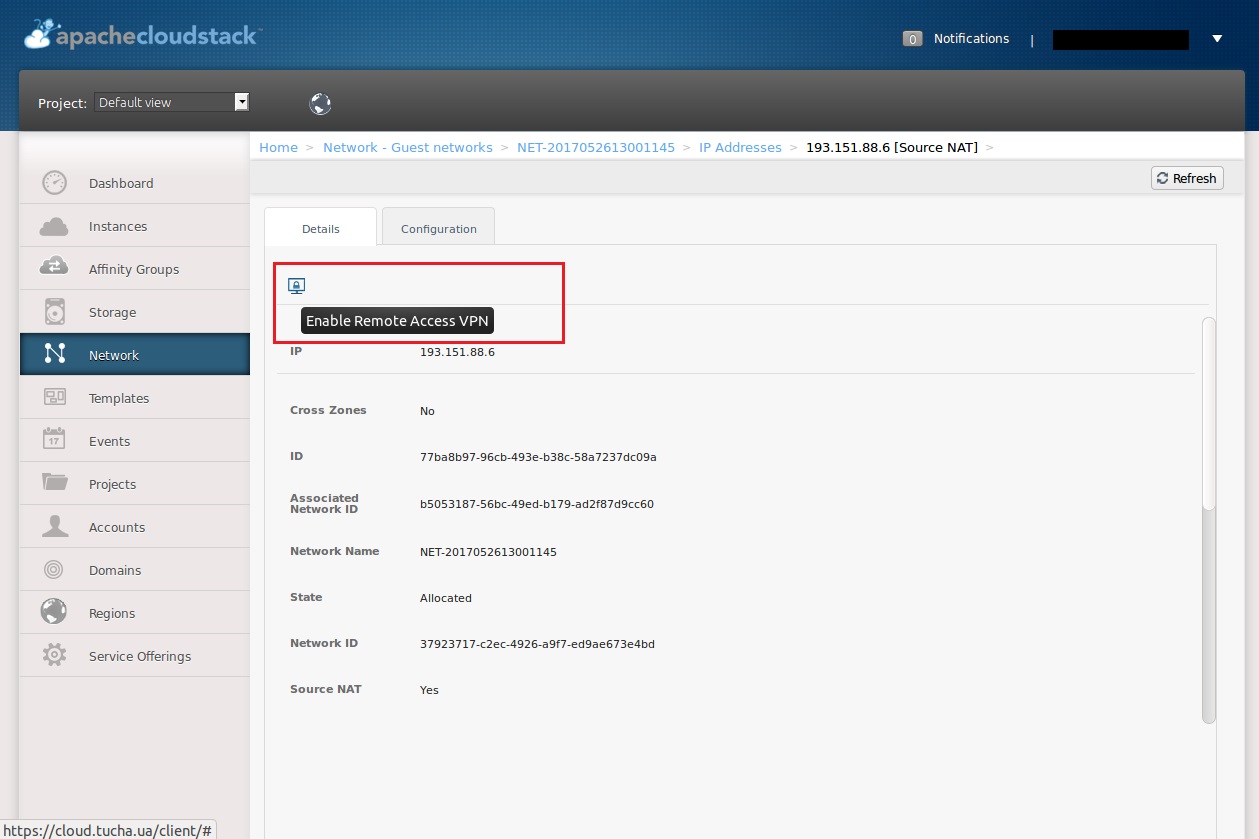
6. Open the address settings and click Enable Remote Access VPN.
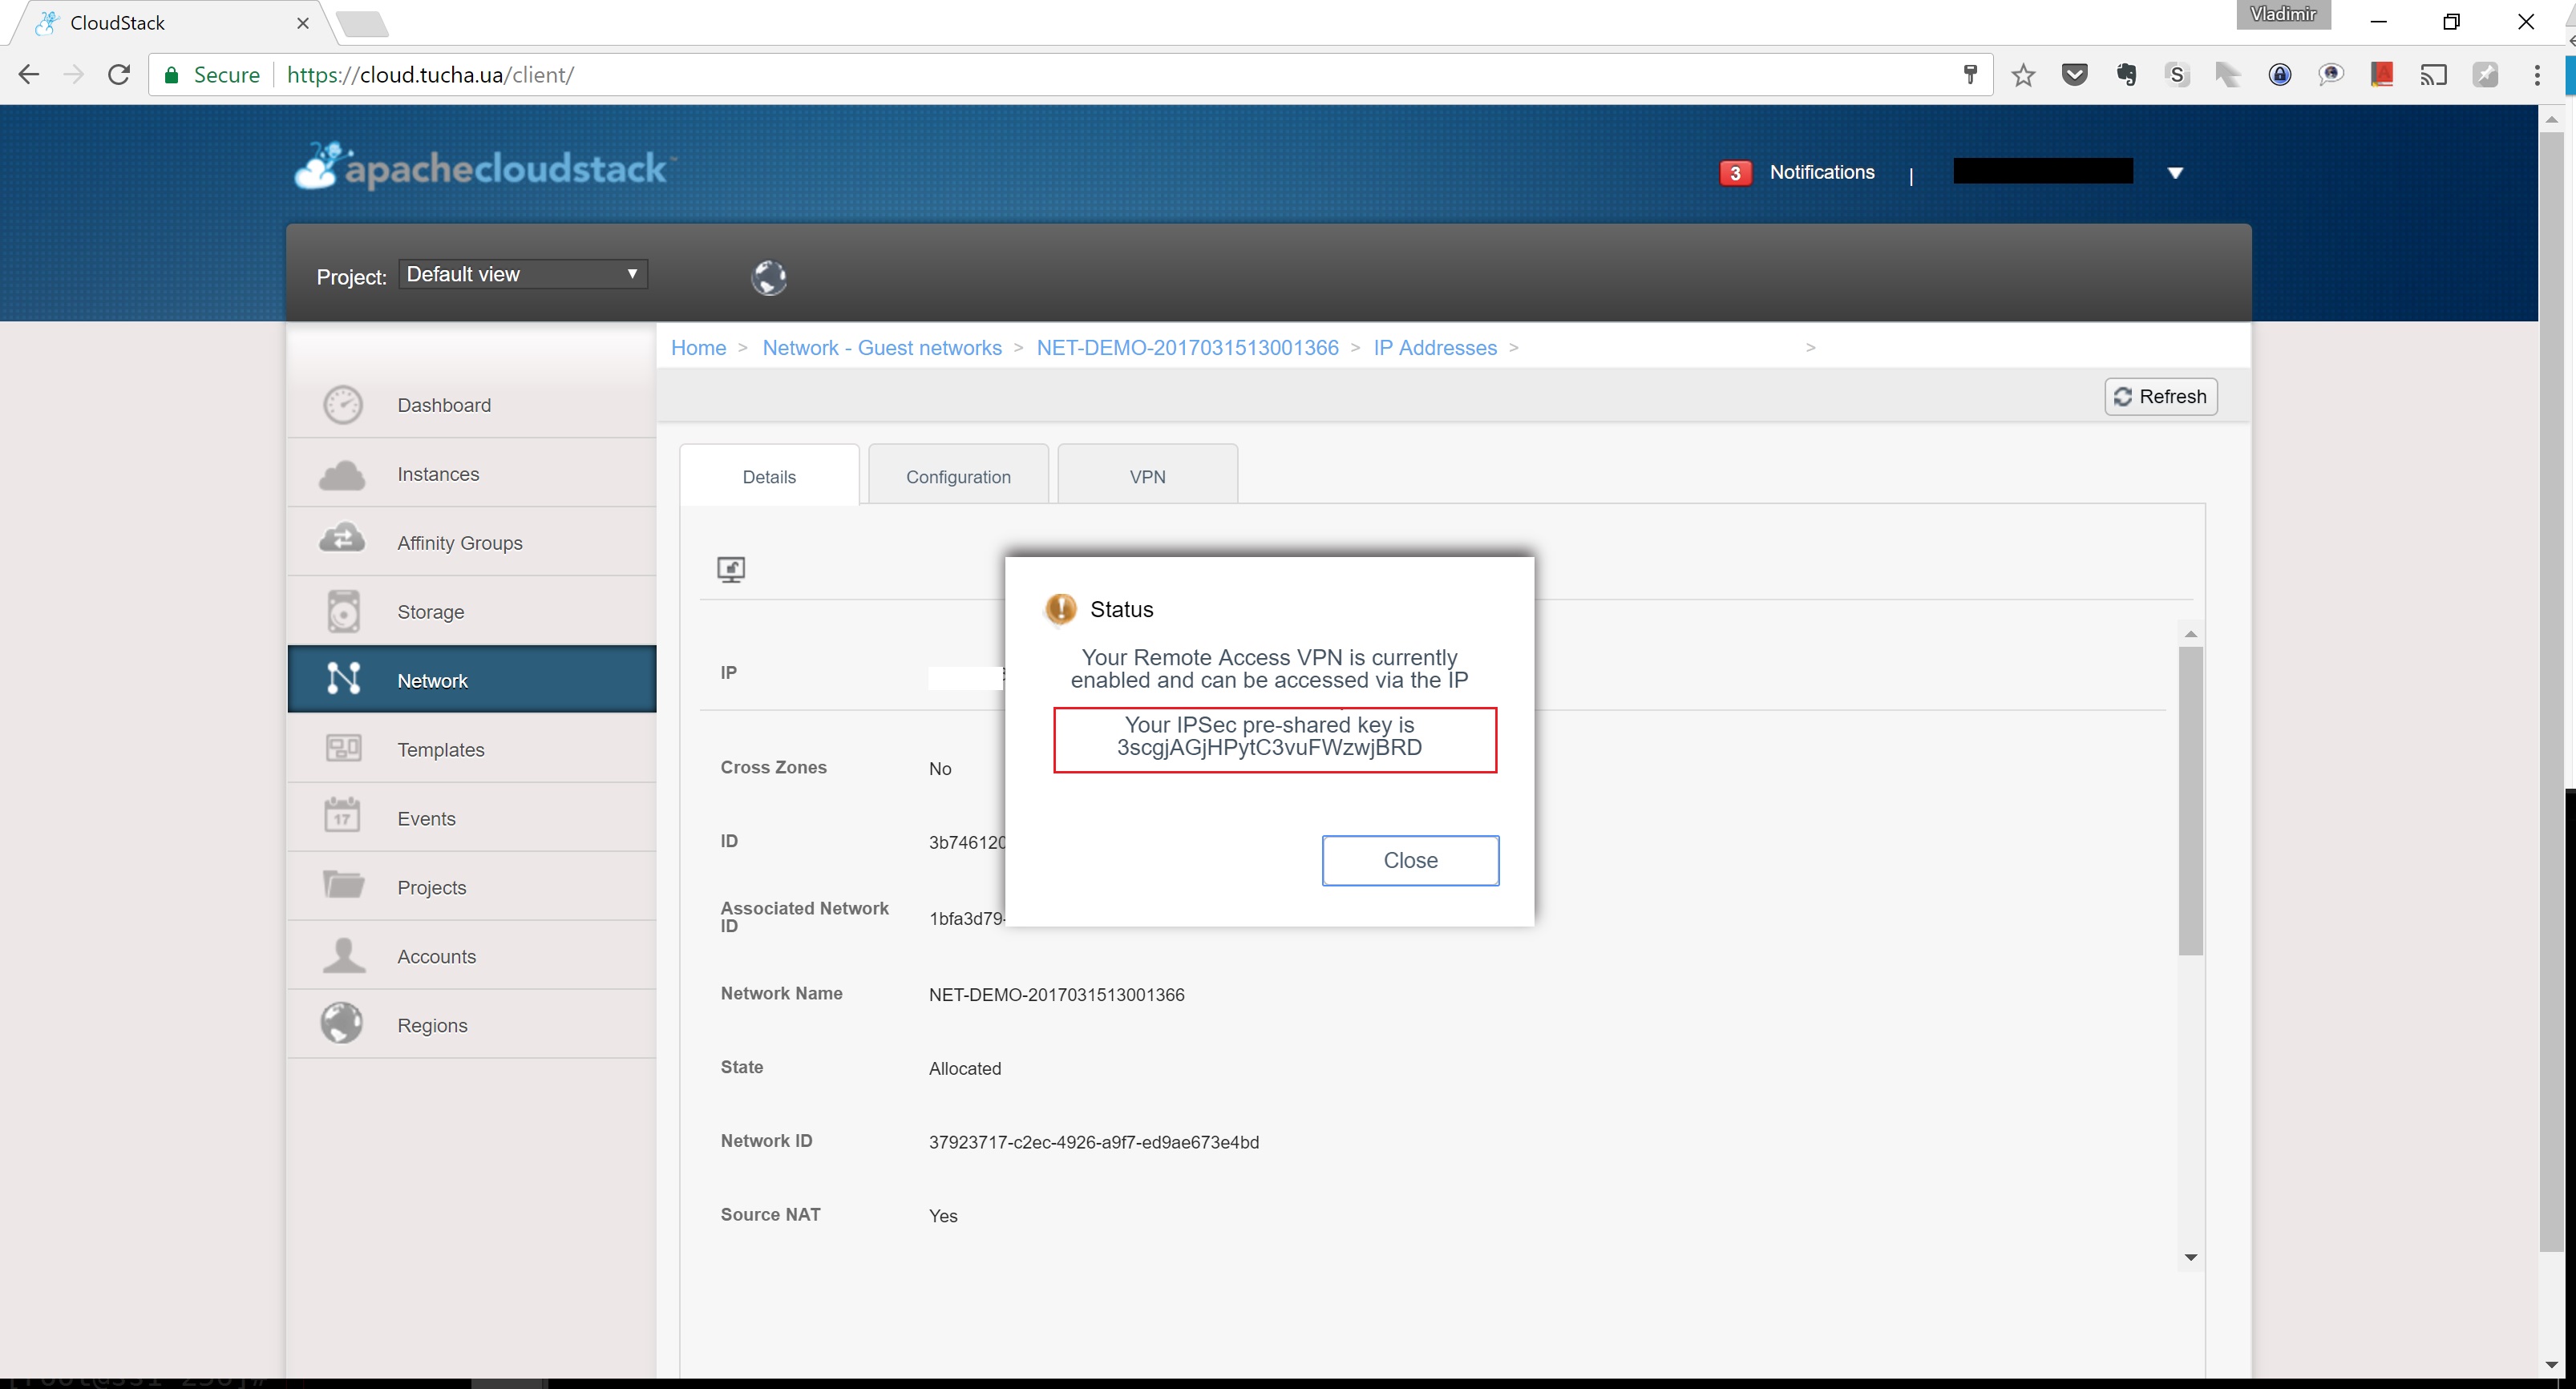
7. Now we know that for connecting you need to use the newly generated PSK (in our case, kh9g58BfprPq5XADvgKNOBTS).
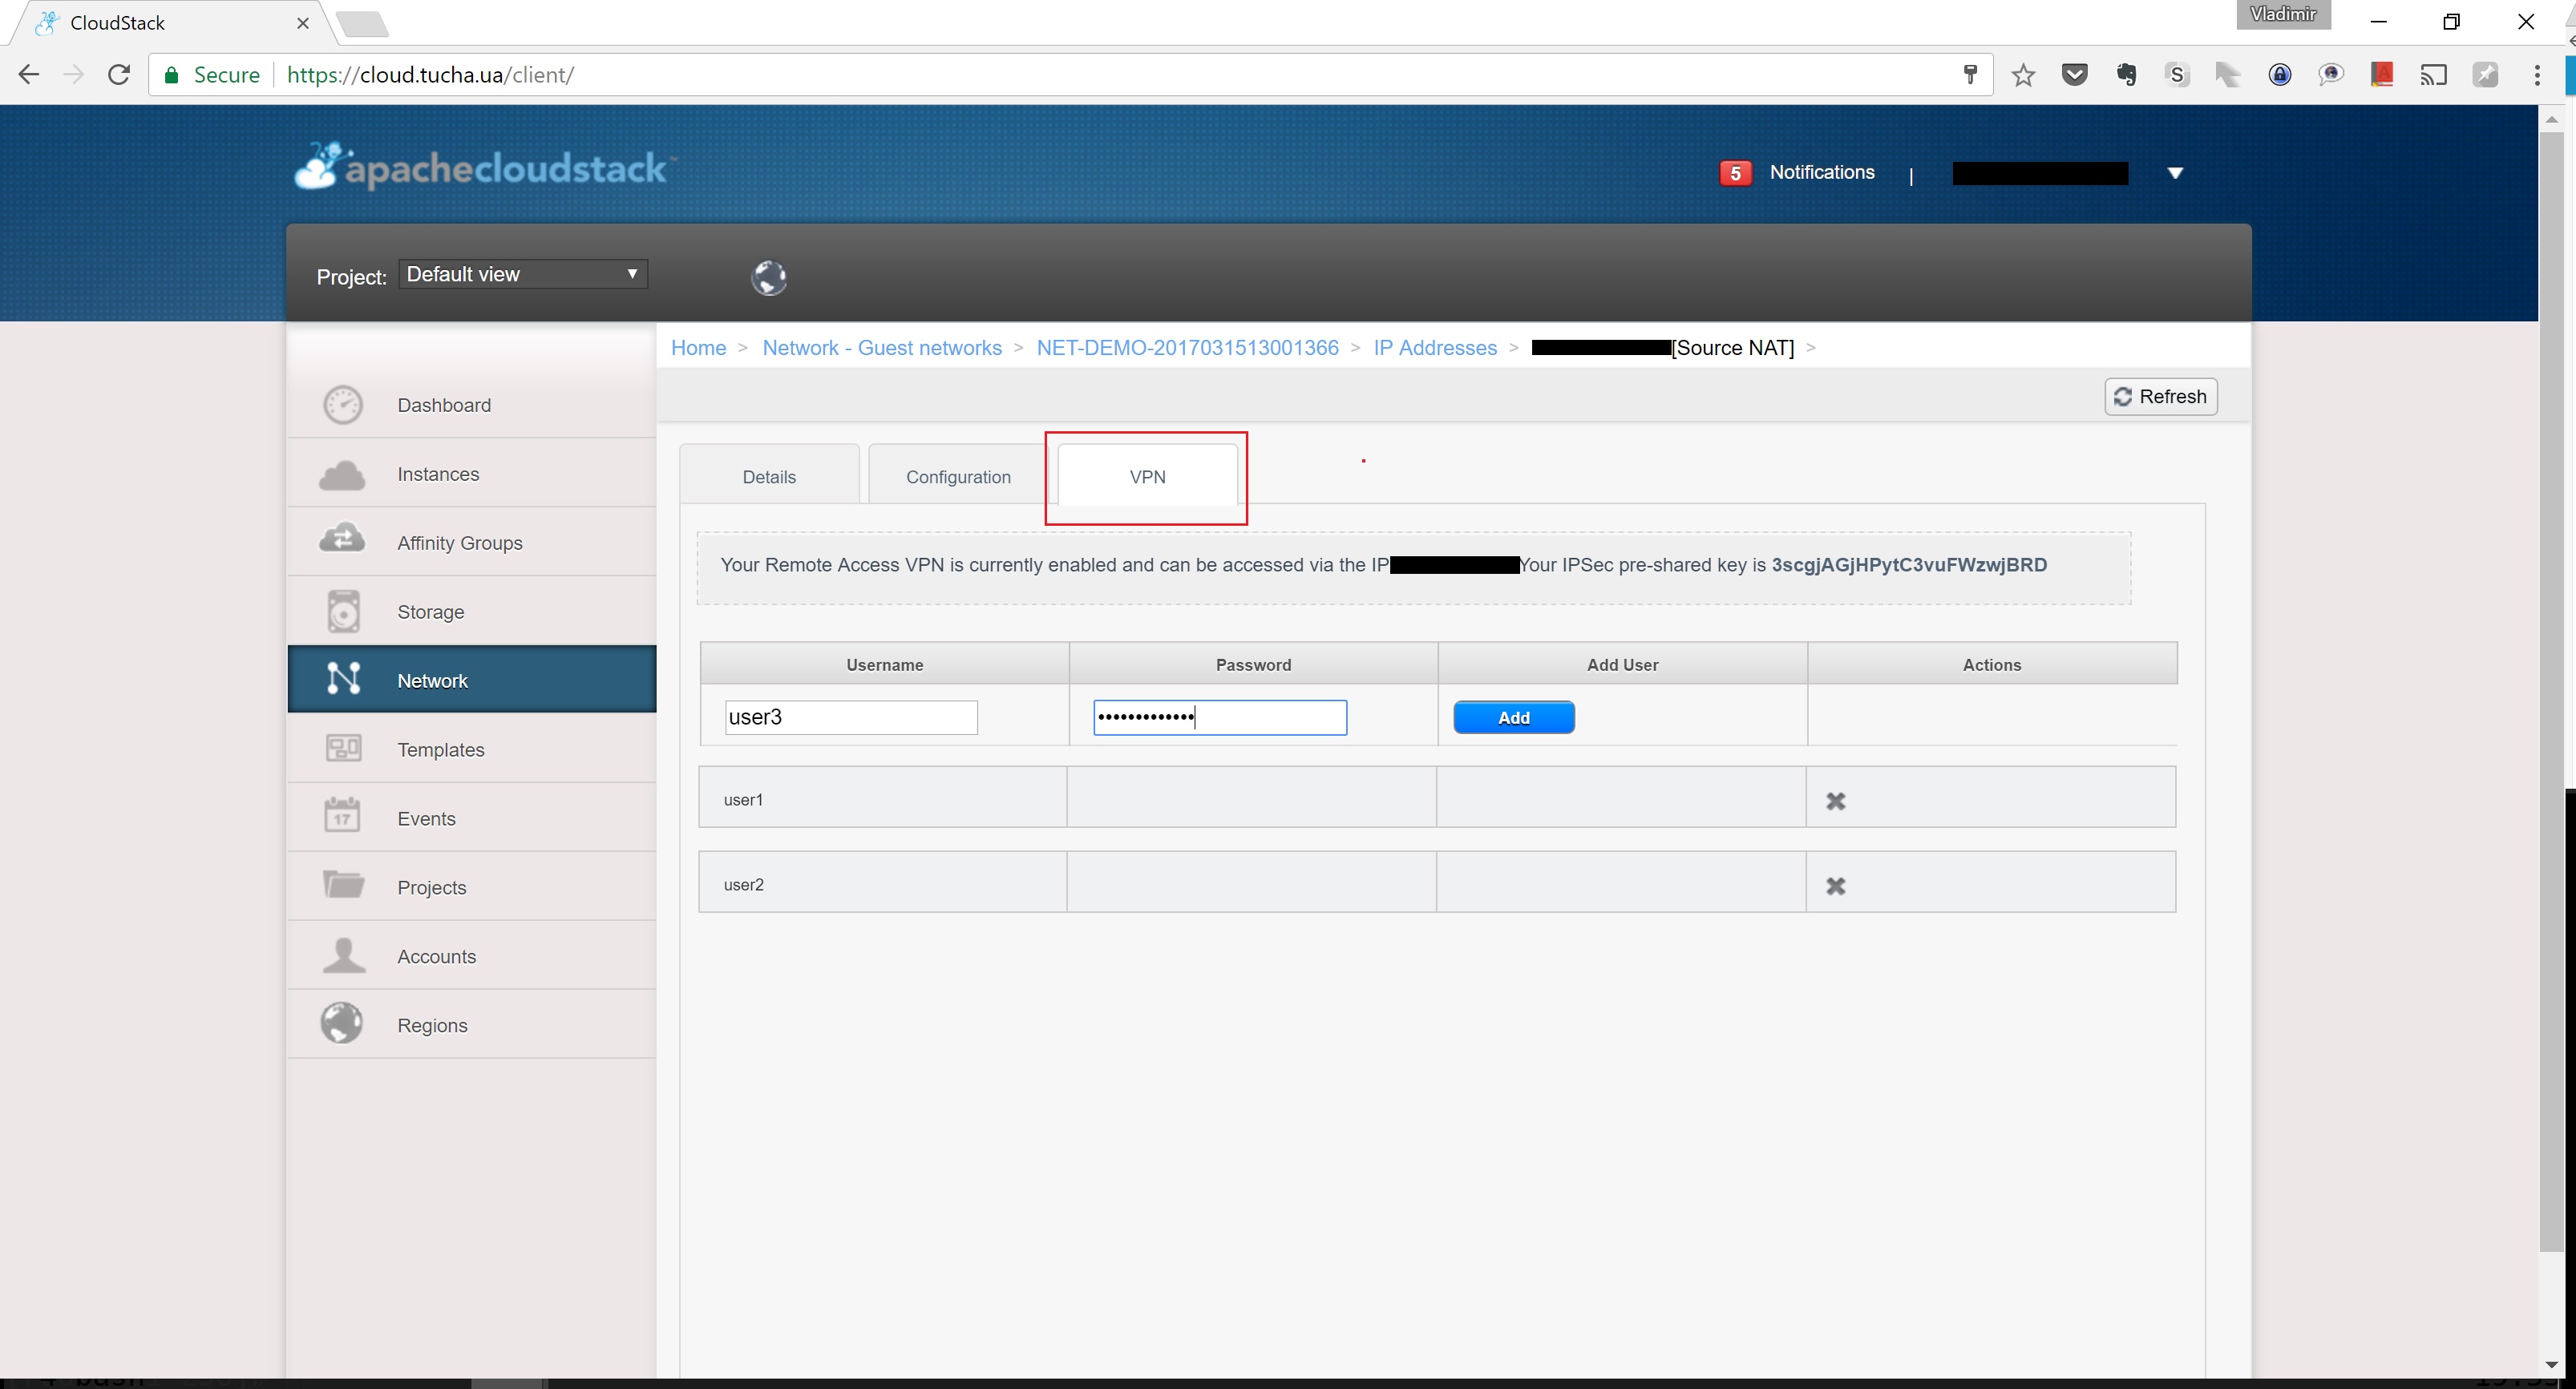
8. Open the VPN tab (it has just appeared) and create users.
The system will continue to create the virtual router, private network, and new interface in the virtual machine for some time.
The interface is connected. If your operating system is also configured – the solution is ready to use. If not yet, use our step-by-step instruction.
Contact us for competent 24×7 advice to ask additional questions or learn more about our cloud services. See you soon!